Creating a Local Kubernetes Development Environment - Installing and Using minikube
Creating a local development environment and running an application
This time, the goal is to run a web application container on local Kubernetes.
For reference, this article focuses on installation on macOS. The method may differ depending on your environment.
Installing and using Minikube
This time, use Minikube, a tool that makes it easy to run Kubernetes in a local environment. With this tool, you can create a single-node Kubernetes cluster.
For how to use Minikube, refer to the official documentation.
Preparation before installation
Install Docker
Before installing minikube, it is strongly recommended to install and use Docker.
Install kubectl
kubectl is a CLI tool used to communicate with a Kubernetes cluster and check the status of various objects or perform CRUD operations.
It is needed after installing minikube to work with the Kubernetes cluster.
Here, install it on macOS using Homebrew.
brew install kubectl
For other systems, proceed while referring to the official documentation.
Install Minikube on macOS
Here, install it with Homebrew.
brew install minikube
% brew install minikube
Running `brew update --auto-update`...
==> Auto-updated Homebrew!
Updated 1 tap (homebrew/core).
==> New Formulae
agg            echidna        kalign         libplacebo     shaderc
c              gator          kubesess       licenseplist   taplo
distrobox      hof            libff          popeye         vineyard

You have 3 outdated formulae installed.
You can upgrade them with brew upgrade
or list them with brew outdated.

==> Downloading https://ghcr.io/v2/homebrew/core/kubernetes-cli/manifests/1.25.0
######################################################################## 100.0%

... middle omitted ...

==> Summary
🍺  /opt/homebrew/Cellar/minikube/1.26.1: 9 files, 70.6MB
==> Running `brew cleanup minikube`...
Disable this behaviour by setting HOMEBREW_NO_INSTALL_CLEANUP.
Hide these hints with HOMEBREW_NO_ENV_HINTS (see `man brew`).
==> Caveats
==> minikube
zsh completions have been installed to:
  /opt/homebrew/share/zsh/site-functions
Using Minikube
Start a Minikube cluster
Check whether installation succeeded with the following command that starts a Kubernetes cluster.
You can start it by specifying a Kubernetes version as follows.
minikube start --kubernetes-version [version to start]
If you do not specify a version, the new version starts.
minikube start
% minikube start
😄  Darwin 12.5.1 (arm64) 의 minikube v1.26.1
🆕  이제 1.24.3 버전의 쿠버네티스를 사용할 수 있습니다. 업그레이드를 원하신다면 다음과 같이 지정하세요: --kubernetes-version=v1.24.3
✨  기존 프로필에 기반하여 docker 드라이버를 사용하는 중
👍  minikube 클러스터의 minikube 컨트롤 플레인 노드를 시작하는 중
🚜  베이스 이미지를 다운받는 중 ...

... middle omitted ...

stderr:
	[WARNING Swap]: running with swap on is not supported. Please disable swap
	[WARNING SystemVerification]: this Docker version is not on the list of validated versions: 20.10.17. Latest validated version: 18.09
	[WARNING Service-Kubelet]: kubelet service is not enabled, please run 'systemctl enable kubelet.service'
error execution phase wait-control-plane: couldn't initialize a Kubernetes cluster
To see the stack trace of this error execute with --v=5 or higher

💡  권장: Check output of 'journalctl -xeu kubelet', try passing --extra-config=kubelet.cgroup-driver=systemd to minikube start
🍿  관련 이슈: https://github.com/kubernetes/minikube/issues/4172
Check after starting the Minikube cluster
Minikube downloads and runs a Docker image, creates a Kubernetes cluster, and completes the ~/.kube/config file configuration for connecting with kubectl.
Let’s look at each item.
The Docker image downloaded when minikube starts can be checked as follows.
% docker images
REPOSITORY                    TAG       IMAGE ID       CREATED        SIZE
gcr.io/k8s-minikube/kicbase   v0.0.33   f7ba2bce4549   5 weeks ago    1.06GB
You can confirm that the minikube container was started from the downloaded Docker image and a Kubernetes cluster was created.
% docker ps
CONTAINER ID   IMAGE                                 COMMAND                  CREATED             STATUS             PORTS                                                                                                                        NAMES
d9391f64eba5   gcr.io/k8s-minikube/kicbase:v0.0.33   "/usr/local/bin/entr..."   About an hour ago   Up About an hour   0.0.0.0:49463->22/tcp, 0.0.0.0:49464->2376/tcp, 0.0.0.0:49466->5000/tcp, 0.0.0.0:49467->8443/tcp, 0.0.0.0:49465->32443/tcp   minikube
A config file containing information for connecting Kubernetes Cluster and kubectl has been created.
% cat ~/.kube/config
apiVersion: v1
clusters:
- cluster:
    certificate-authority: /Users/user/.minikube/ca.crt
    server: https://127.0.0.1:50472
  name: minikube
contexts:
- context:
    cluster: minikube
    user: minikube
  name: minikube
current-context: minikube
kind: Config
preferences: {}
users:
- name: minikube
  user:
    client-certificate: /Users/user/.minikube/profiles/minikube/client.crt
    client-key: /Users/user/.minikube/profiles/minikube/client.key
Check Minikube cluster status
The command to check the cluster status is as follows.
minikube status
% minikube status
minikube
type: Control Plane
host: Running
kubelet: Stopped
apiserver: Stopped
kubeconfig: Configured
Pause and resume a Minikube cluster
The command to pause a Kubernetes cluster is as follows.
minikube pause
After pausing, access to the cluster through kubectl and additional commands time out and cannot be used.
However, already deployed applications are not affected and continue running.
To resume the cluster from the paused state, use the following command.
minikube unpause
Stop a Minikube cluster
minikube stop
% minikube stop
✋  Stopping node "minikube"  ...
🛑  Powering off "minikube" via SSH ...
🛑  1 node stopped.
Delete a Minikube cluster
minikube delete
The command to initialize and delete everything is as follows.
% minikube delete --all
🔥  docker 의 "minikube" 를 삭제하는 중 ...
🔥  /Users/user/.minikube/machines/minikube 제거 중 ...
💀  "minikube" 클러스터 관련 정보가 모두 삭제되었습니다
🔥  모든 프로필이 성공적으로 삭제되었습니다
Configure and start a web server with Kubernetes
Now that minikube is installed, create a Kubernetes environment and run a container.
For the web server, use echo-server, which returns a simple response suitable for Minikube.
Create a minikube cluster
Start minikube and create a cluster. If it is already running, you do not need to start it again.
minikube start
Check the running state of the Docker container.
% docker ps
CONTAINER ID   IMAGE                                 COMMAND                  CREATED              STATUS              PORTS                                                                                                                        NAMES
39b6898f6256   gcr.io/k8s-minikube/kicbase:v0.0.33   "/usr/local/bin/entr..."   About a minute ago   Up About a minute   0.0.0.0:51435->22/tcp, 0.0.0.0:51436->2376/tcp, 0.0.0.0:51438->5000/tcp, 0.0.0.0:51439->8443/tcp, 0.0.0.0:51437->32443/tcp   minikube
You can confirm that the minikube container is running.
Create a deployment using kubectl
Next, create a Kubernetes Deployment with kubectl. By creating this Kubernetes Deployment object, the application can be run. It can be written as a YAML file. This itself is not exactly a service, but the Deployment app for creating Pods.
% kubectl create deployment hello-minikube --image=k8s.gcr.io/echoserver:1.10
deployment.apps/hello-minikube created
If you are using an M1 MacBook, use echoserver-arm:1.8 instead of echoserver:1.10.
kubectl create deploy hello-minikube --image=k8s.gcr.io/echoserver-arm:1.8
Expose the created hello-minikube Deployment as a service. This seems almost equivalent to the actual app.
% kubectl expose deployment hello-minikube --type=NodePort --port=8080
service/hello-minikube exposed
Check the container deployed to the Pod
At this point, check the Docker container status.
% docker ps
CONTAINER ID   IMAGE                                 COMMAND                  CREATED         STATUS         PORTS                                                                                                                        NAMES
24733d0fd443   gcr.io/k8s-minikube/kicbase:v0.0.33   "/usr/local/bin/entr..."   5 minutes ago   Up 5 minutes   0.0.0.0:54248->22/tcp, 0.0.0.0:54249->2376/tcp, 0.0.0.0:54251->5000/tcp, 0.0.0.0:54247->8443/tcp, 0.0.0.0:54250->32443/tcp   minikube
There is no separate container named hello-minikube; it appears to run on top of the minikube container. Presumably, the single Kubernetes node, Pods, and Deployment were created inside this minikube container.
Check whether a Pod was created.
% kubectl get pod
NAME                              READY   STATUS    RESTARTS   AGE
hello-minikube-5d44b6b577-l99jz   1/1     Running   0          4m59s
The STATUS is Running, so it is running. Also, 1/1 shows that there is one Pod.
Check service operation
The service URL can be checked with the following command.
% minikube service hello-minikube --url
http://127.0.0.1:54612
If you check it in a browser, you can confirm that the application is running.
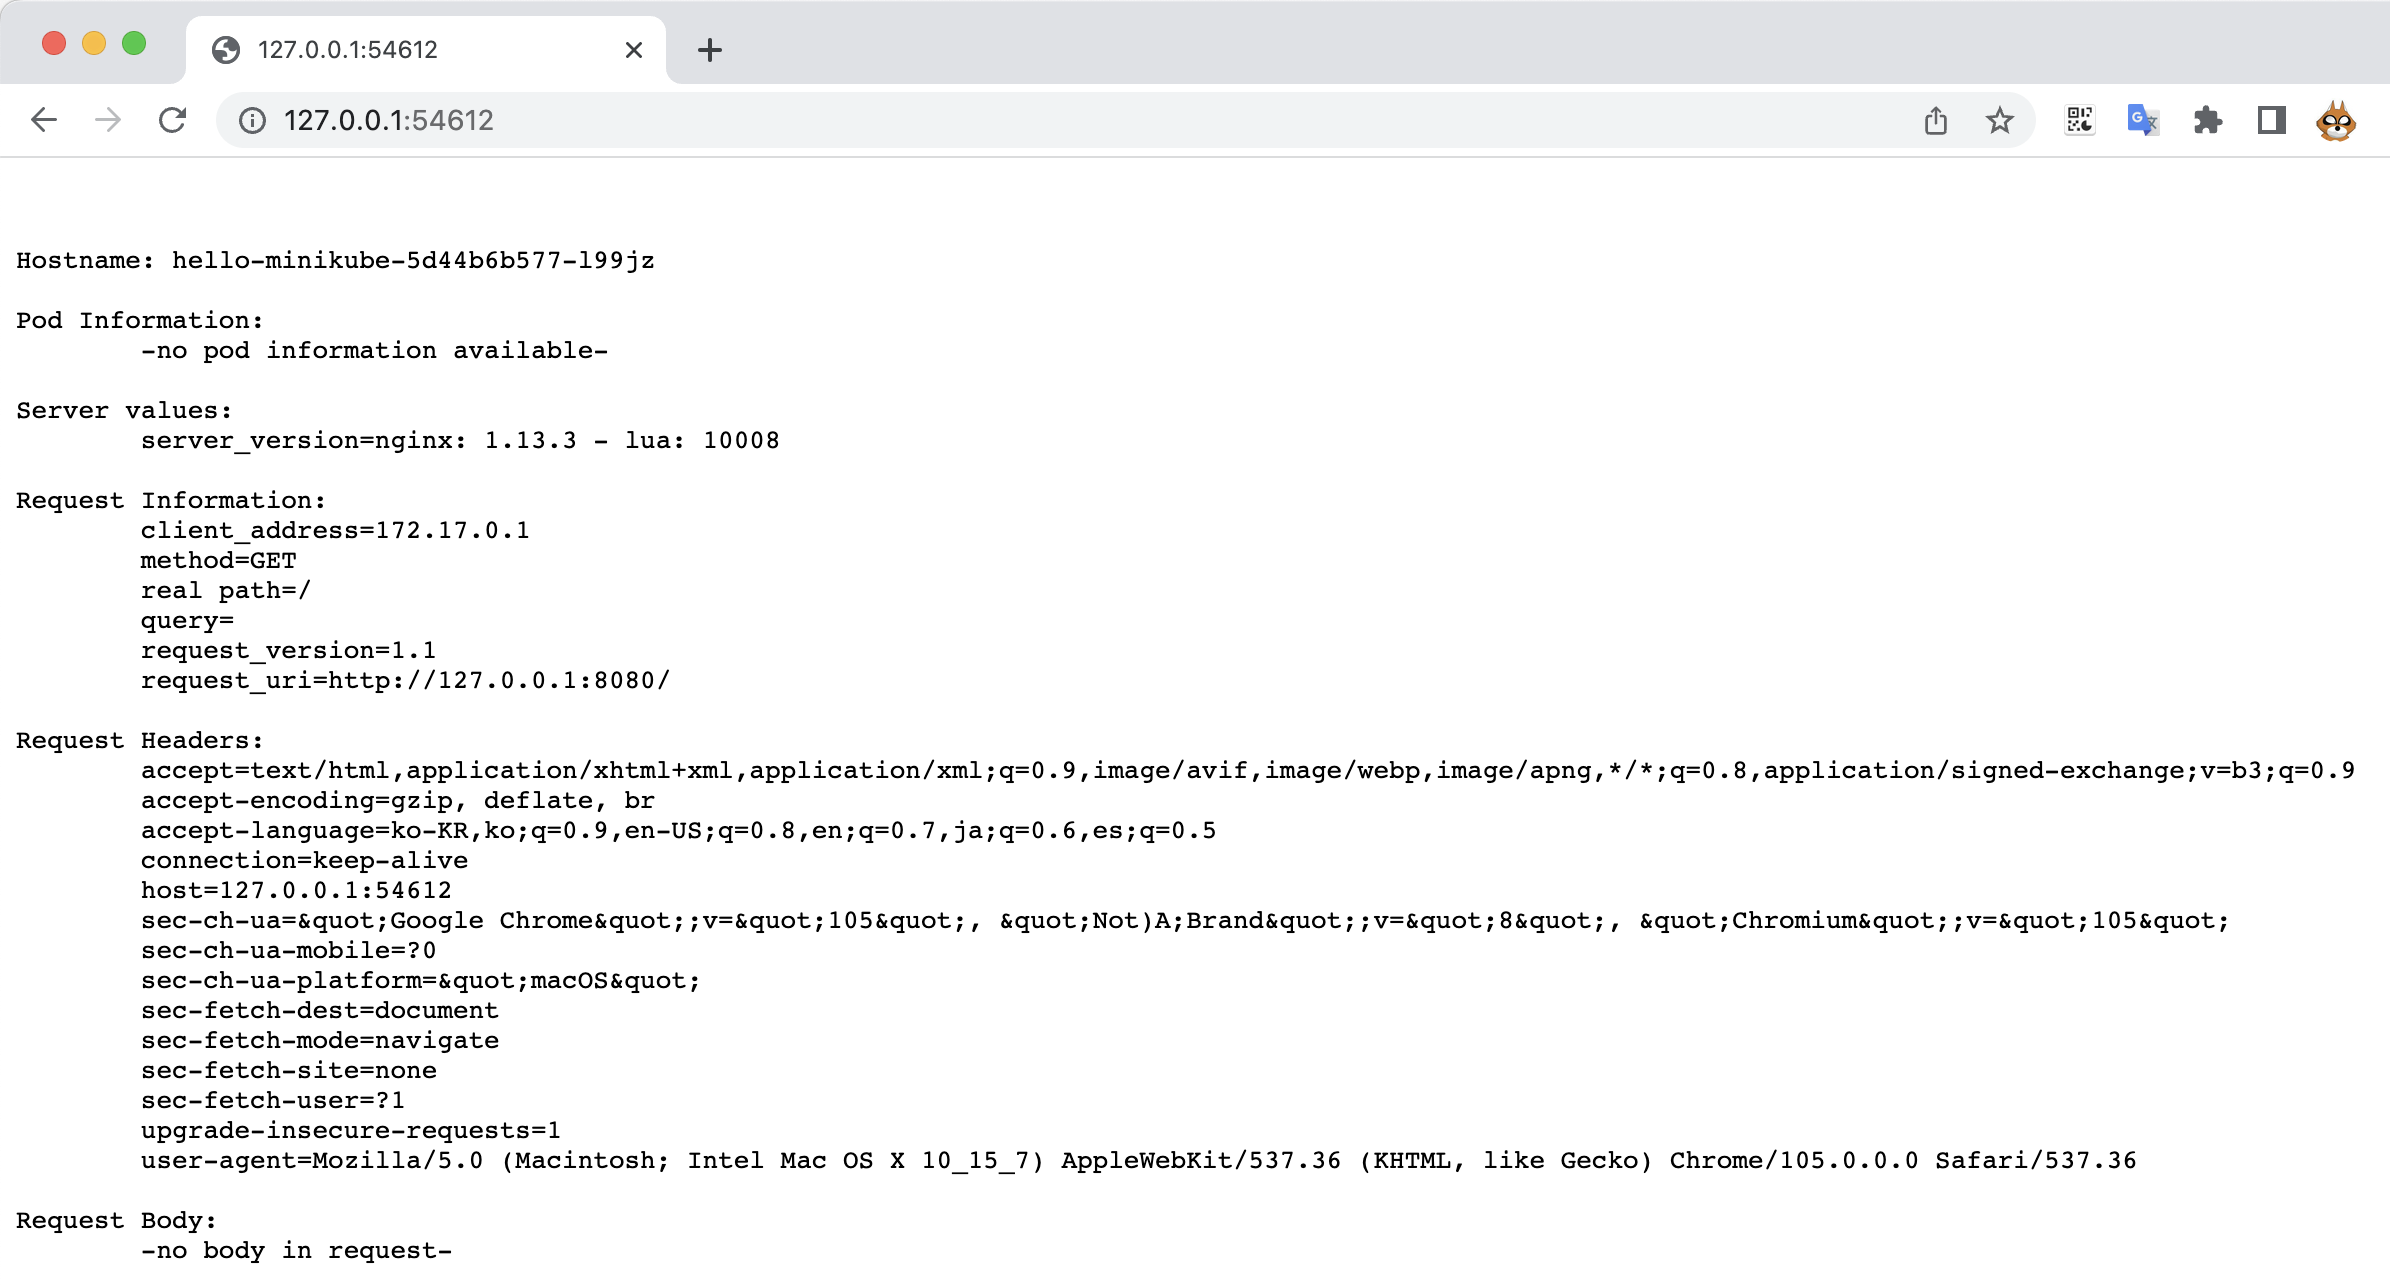
Delete
The following is the deletion procedure.
Delete the service with the following command.
% kubectl delete services hello-minikube
service "hello-minikube" deleted
Delete the hello-minikube Deployment with the following command.
% kubectl delete deployment hello-minikube
deployment.apps "hello-minikube" deleted
Appendix: looking inside the container
The official-document tutorial for creating a local development environment ends around here, but let’s look inside the container.
Enter minikube with the following command.
% docker exec -itu 0 minikube /bin/bash
root@minikube:/#
After entering the container, go to the root directory and run ll to see what is there.
root@minikube:/# ll
total 80
drwxr-xr-x   1 root root 4096 Sep  7 06:33 ./
drwxr-xr-x   1 root root 4096 Sep  7 06:33 ../
-rwxr-xr-x   1 root root    0 Sep  7 06:33 .dockerenv*
... omitted ...
drwxr-xr-x  14 root root 4096 Sep  7 06:33 var/
root@minikube:/#
Check processes with the top command.
root@minikube:/# top
top - 07:23:51 up 18:40,  0 users,  load average: 0.69, 0.44, 0.37
Tasks:  38 total,   1 running,  37 sleeping,   0 stopped,   0 zombie

    PID USER      PR  NI    VIRT    RES    SHR S  %CPU  %MEM     TIME+ COMMAND
   1855 root      20   0 1998680 100428  64300 S   7.6   1.2   3:17.60 kubelet
   1675 root      20   0 1171496 360280  72324 S   7.3   4.5   5:20.97 kube-apiserver
    588 root      20   0 2028192  91008  44340 S   5.3   1.1   1:24.24 dockerd

   ... omitted ...
The console output shows that kubelet and kube-apiserver processes are running near the top.
kube-apiserver provides an API that accepts operations from developers, and kubelet exists as an agent on each node, in this case a single node, and ensures Pod execution.
There are many processes written as containerd*, showing that several containers are running.
Now list the running Docker containers again with docker ps.
root@minikube:/# docker ps
CONTAINER ID   IMAGE                  COMMAND                  CREATED          STATUS          PORTS     NAMES
20094df9033f   ba04bb24b957           "/storage-provisioner"   59 minutes ago   Up 59 minutes             k8s_storage-provisioner_storage-provisioner_kube-system_514497a4-deaf-4755-a600-73f796f6be9e_1
a9368295b1f7   7a75aeb869dc           "/usr/local/bin/kube..."   59 minutes ago   Up 59 minutes             k8s_kube-proxy_kube-proxy-52hmm_kube-system_d0ed4ddc-0ccc-4f06-aeb9-cc18d5184e77_0
9b1f9ed7a6c1   k8s.gcr.io/pause:3.6   "/pause"                 59 minutes ago   Up 59 minutes             k8s_POD_kube-proxy-52hmm_kube-system_d0ed4ddc-0ccc-4f06-aeb9-cc18d5184e77_0
... omitted ...
root@minikube:/#
This was the first time checking containers running inside a container, and it showed that containers using the echoserver image were running.
As a hypothesis, looking at NAMES, there are containers with the string POD, so Pods seem to be represented as containers.
There also appears to be a kube-proxy container, which seems to operate as a proxy for Services.
This is all for this time. Next time, we will look at Kubernetes architecture and how it behaves while changing settings.
References
- Official documentation
- minikube
- Using echoserver-arm when echoserver fails on minikube with an M1 MacBook - Inflearn