Apache | VirtualHost Configuration | Name-based Virtual Hosts
Name-based Virtual Hosts
With name-based virtual hosting, the IP address does not have to be unique. Apache determines which host is being accessed by checking the Host header included in the client request.
First, use VirtualHost to configure each ServerName.
<VirtualHost IP address:port-number>
    ServerName www1.devkuma.com
    ....
</VirtualHost>

<VirtualHost  IP address:port-number>
    ServerName www2.devkuma.com
    ....
</VirtualHost>
Apache refers to the Host header included in the request and finds the block that matches ServerName. When a matching block is found, that block’s settings are applied.
More specifically, to assign the two hosts ww1.devkuma.com and ww2.devkuma.com to one or more IP addresses and make each access behave differently, configure them as follows.
<VirtualHost *:80>
    ServerName     ww1.devkuma.com
    ServerAdmin    devkuma@devkuma.com
    DocumentRoot   "${SRVROOT}/htdocs-ww1"
    CustomLog      logs/ww1.access.log common
    ErrorLog       logs/ww1.error.log
</VirtualHost>

<VirtualHost *:80>
    ServerName     ww2.devkuma.com
    ServerAdmin    devkuma@devkuma.com
    DocumentRoot   "${SRVROOT}/htdocs-ww2"
    CustomLog      logs/ww2.access.log common
    ErrorLog       logs/ww2.error.log
</VirtualHost>
Note: The *:80 part above may also be specified explicitly with an IP address, such as 192.168.1.2:80.
Practice
Now let’s try the actual exercise. First, register DNS entries for the two hosts. Here, instead of DNS, write the following in the hosts file. For details about the hosts file, see Host Access Settings (hosts file).
127.0.0.1 ww1.devkuma.com
127.0.0.1 ww2.devkuma.com
Next is the httpd.conf configuration. The virtual host settings will be written in the httpd-vhosts.conf file.
First, enable the httpd-vhosts.conf file. Search for httpd-vhosts.conf in the httpd.conf file, and you should find the following.
# Virtual hosts
#Include conf/extra/httpd-vhosts.conf
Remove the # before Include so that httpd-vhosts.conf is loaded.
# Virtual hosts
Include conf/extra/httpd-vhosts.conf
Next, edit the httpd-vhosts.conf file. It is located in the (Apache installation directory)Apache24\conf\extra directory.
It should contain sample settings like the following. Comments are omitted here.
<VirtualHost *:80>
    ServerAdmin webmaster@dummy-host.example.com
    DocumentRoot "${SRVROOT}/docs/dummy-host.example.com"
    ServerName dummy-host.example.com
    ServerAlias www.dummy-host.example.com
    ErrorLog "logs/dummy-host.example.com-error.log"
    CustomLog "logs/dummy-host.example.com-access.log" common
</VirtualHost>

<VirtualHost *:80>
    ServerAdmin webmaster@dummy-host2.example.com
    DocumentRoot "${SRVROOT}/docs/dummy-host2.example.com"
    ServerName dummy-host2.example.com
    ErrorLog "logs/dummy-host2.example.com-error.log"
    CustomLog "logs/dummy-host2.example.com-access.log" common
</VirtualHost>
Here, change it as follows.
<VirtualHost *:80>
    ServerName     ww1.devkuma.com
    ServerAdmin    devkuma@devkuma.com
    DocumentRoot   "${SRVROOT}/htdocs-ww1"
    CustomLog      logs/ww1.access.log common
    ErrorLog       logs/ww1.error.log
</VirtualHost>

<VirtualHost *:80>
    ServerName     ww2.devkuma.com
    ServerAdmin    devkuma@devkuma.com
    DocumentRoot   "${SRVROOT}/htdocs-ww2"
    CustomLog      logs/ww2.access.log common
    ErrorLog       logs/ww2.error.log
</VirtualHost>
Note: The httpd-vhosts.conf file is loaded into httpd.conf through Include. Therefore, the log format name common specified above uses the common format defined in httpd.conf.
Also create each document root as configured above, then create and place separate HTML files as follows.
{Apache installation directory}/htdocs-ww1/index.html
<html>
<body>
<h1>WW1 Page</h1>
</body>
</html>
{Apache installation directory}/htdocs-ww2/index.html
<html>
<body>
<h1>WW2 Page</h1>
</body>
</html>
In the httpd.conf file, set appropriate permissions for the two document roots as follows.
<Directory "${SRVROOT}/htdocs-ww1">
    Require all granted
</Directory>

<Directory "${SRVROOT}/htdocs-ww2">
    Require all granted
</Directory>
The preparation is now complete. First, access http://ww1.devkuma.com.
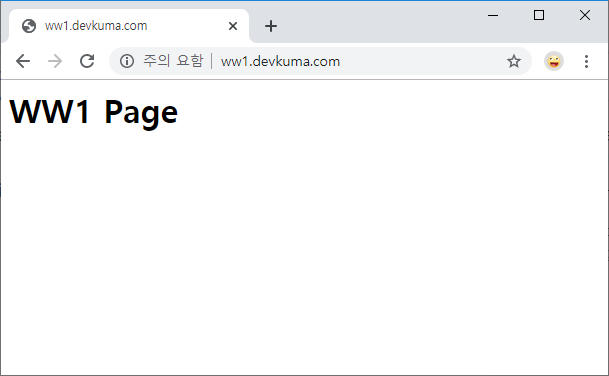
The HTML file contained in the document root for ww1.devkuma.com is displayed.
Next, access http://ww2.devkuma.com/.
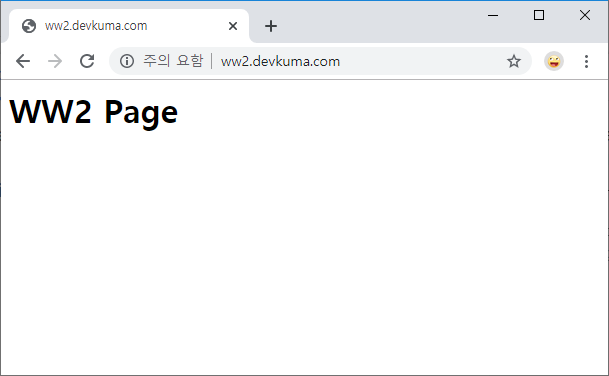
The HTML file contained in the document root for ww2.devkuma.com is displayed.
This explains how to use one IP address and Apache to return separate pages for hosts using multiple domains.