Comparing Two Files and Highlighting Differences in Visual Studio Code
Displaying the Differences Between Two Files
First, open the two files you want to compare and activate one of them.
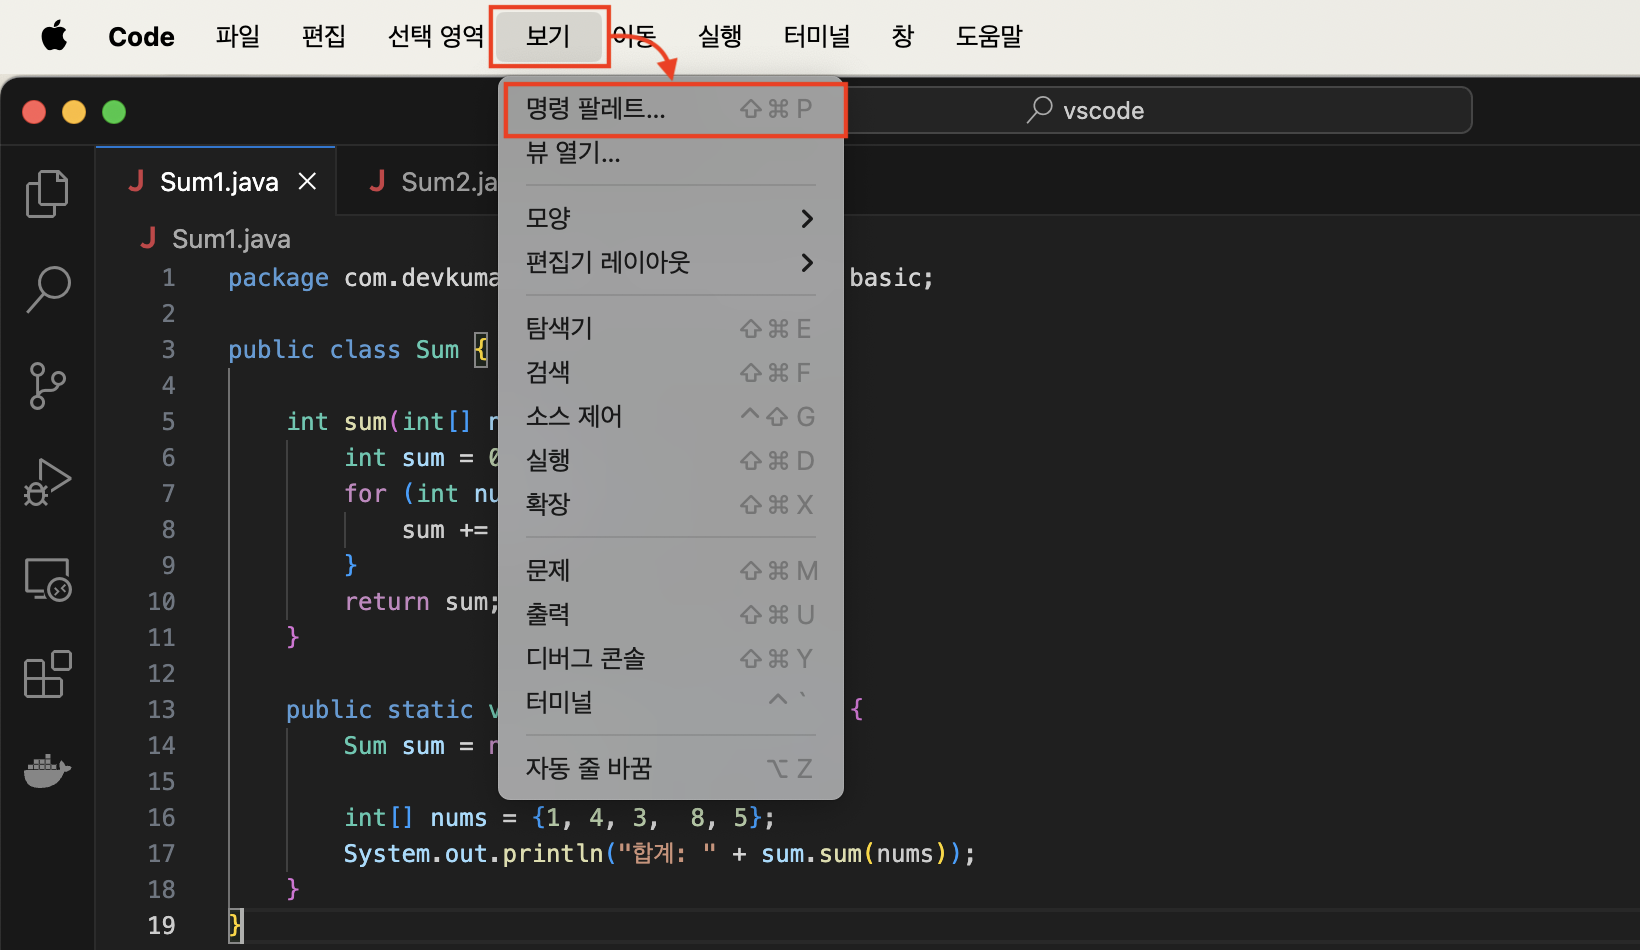
Click “Command Palette” in the “View” menu to open the Command Palette.
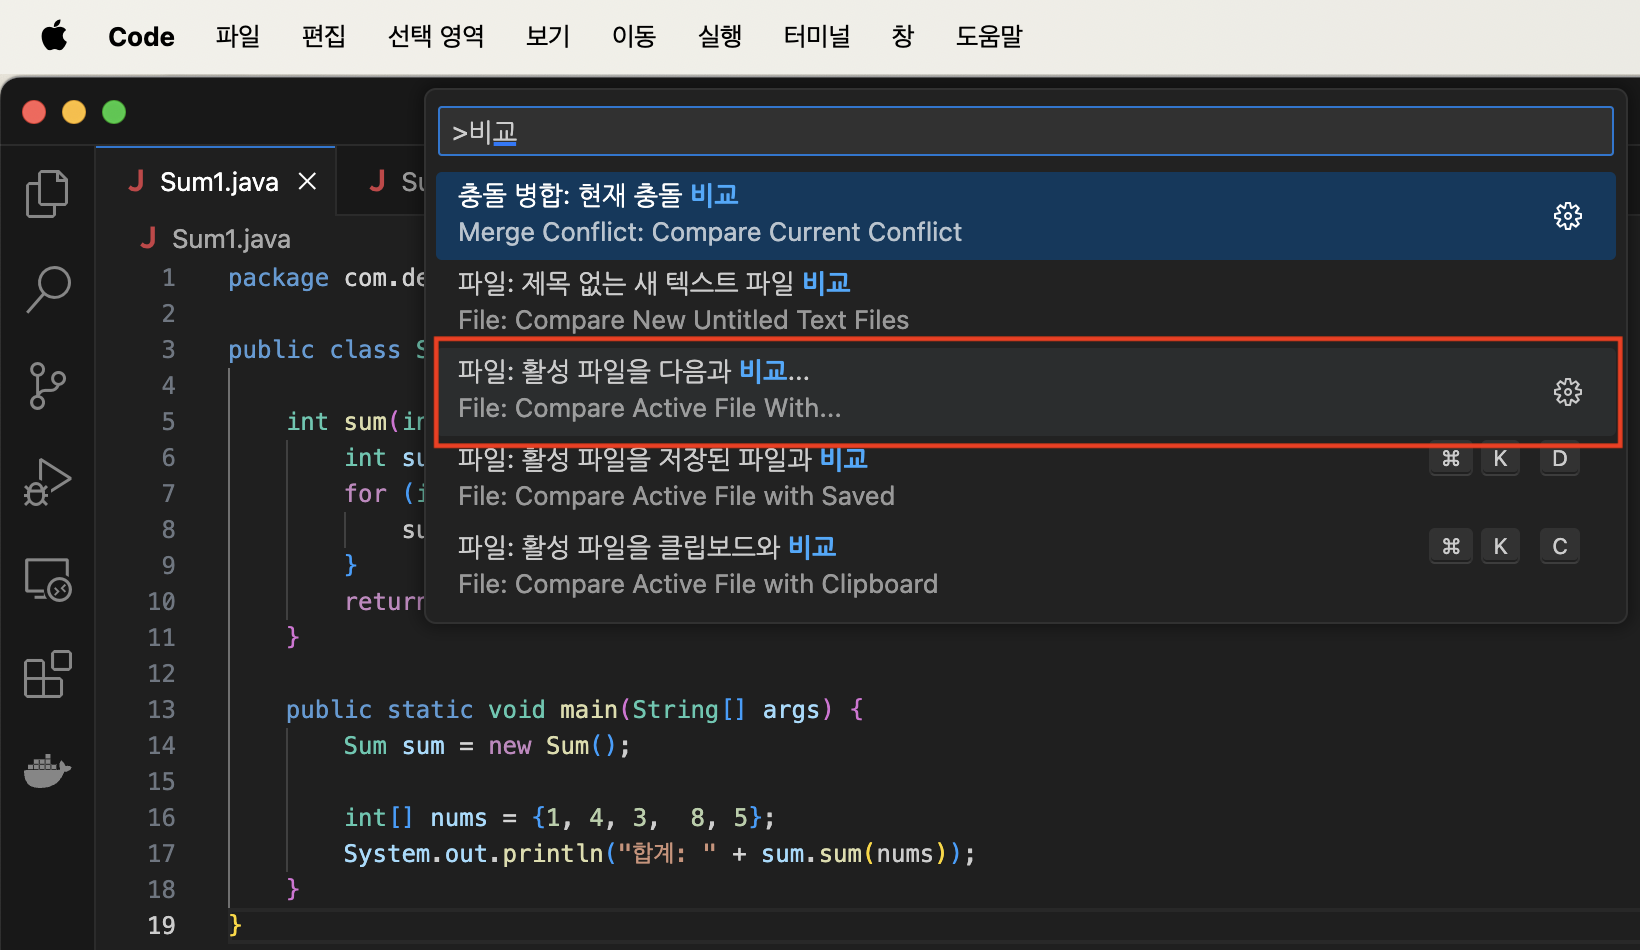
When the Command Palette opens, type “Compare”. From the displayed commands, click “File: Compare Active File With…”.
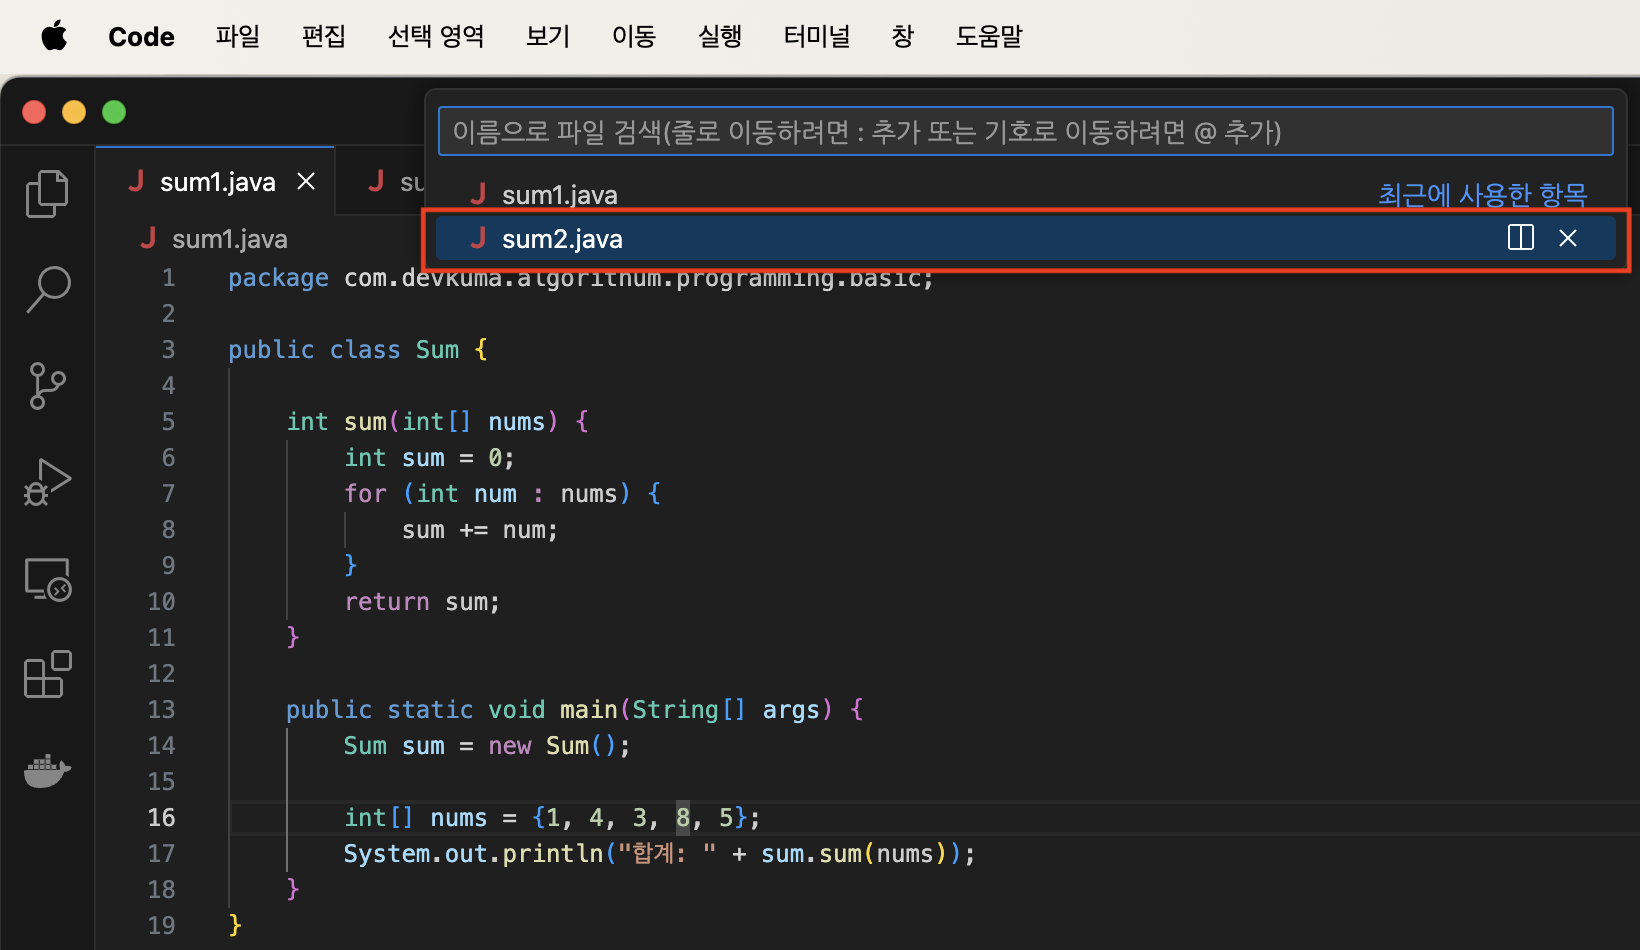
Click the second file to compare.
The two files are displayed side by side, with the differences and corresponding lines highlighted.
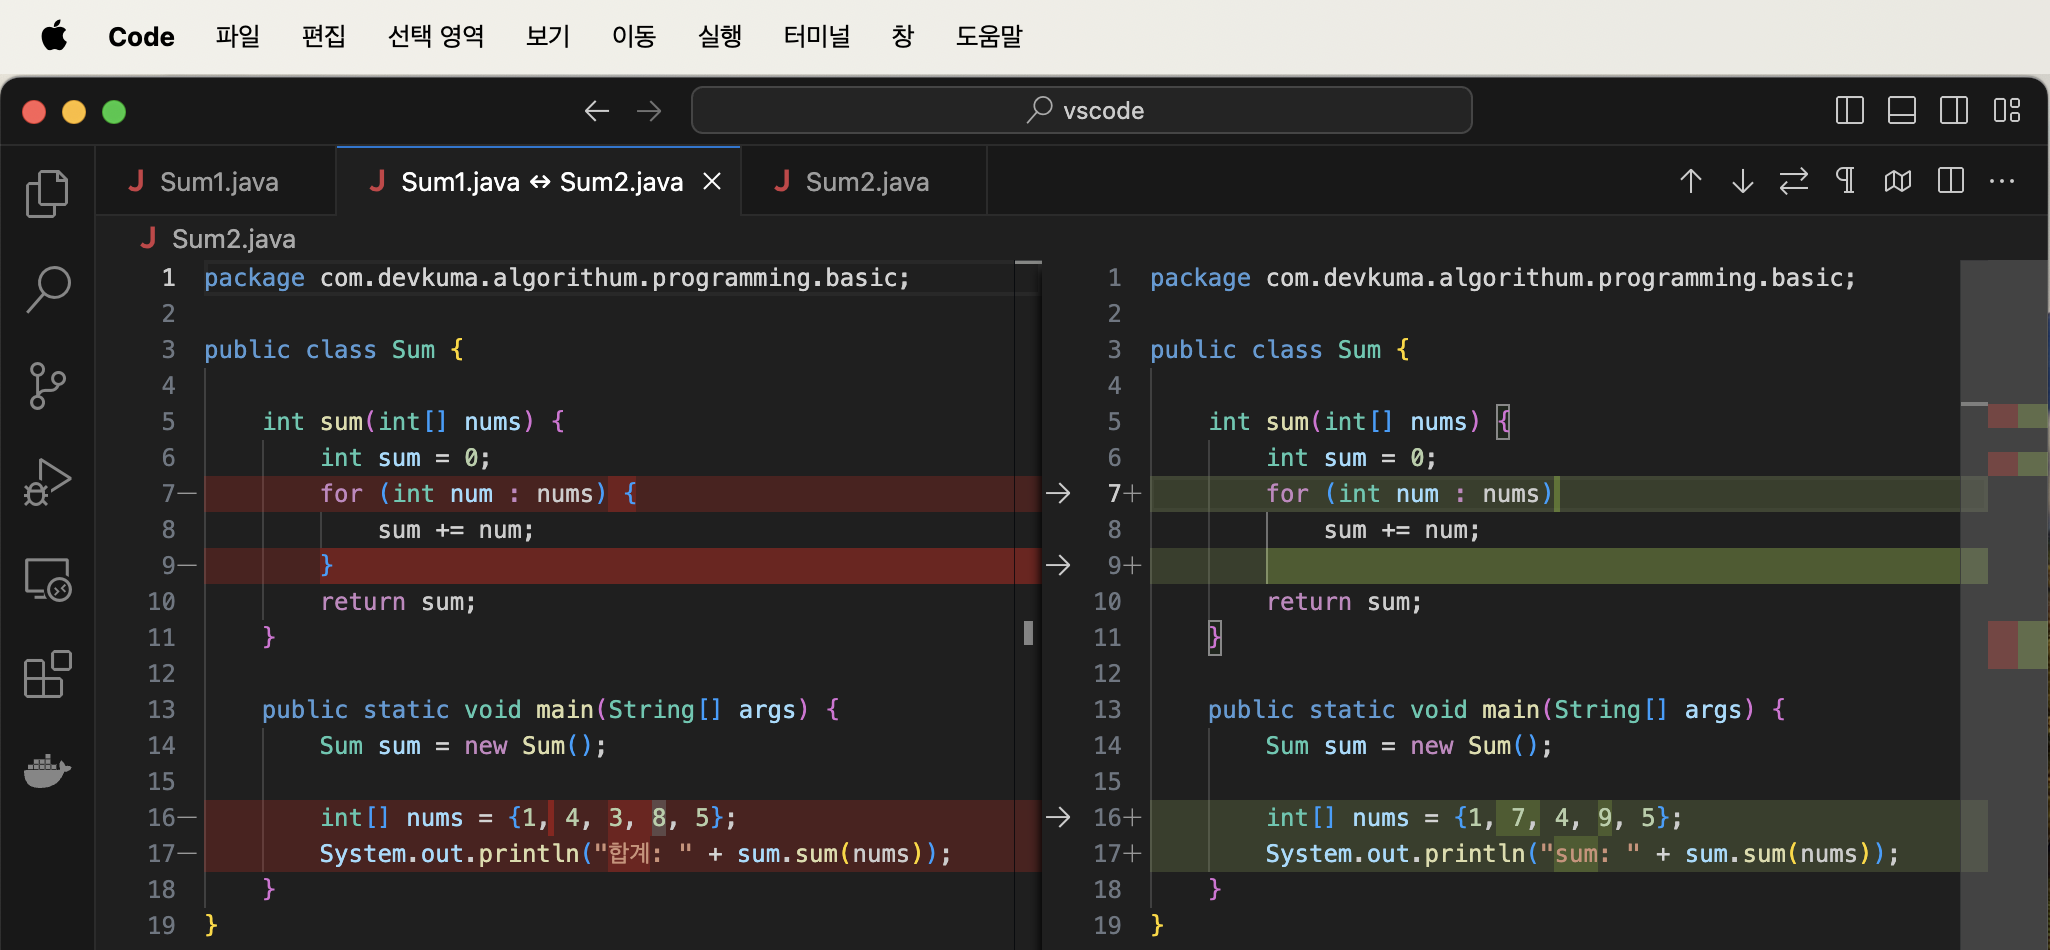
This lets you review the differences between the two selected files.
Viewing Differences Inline
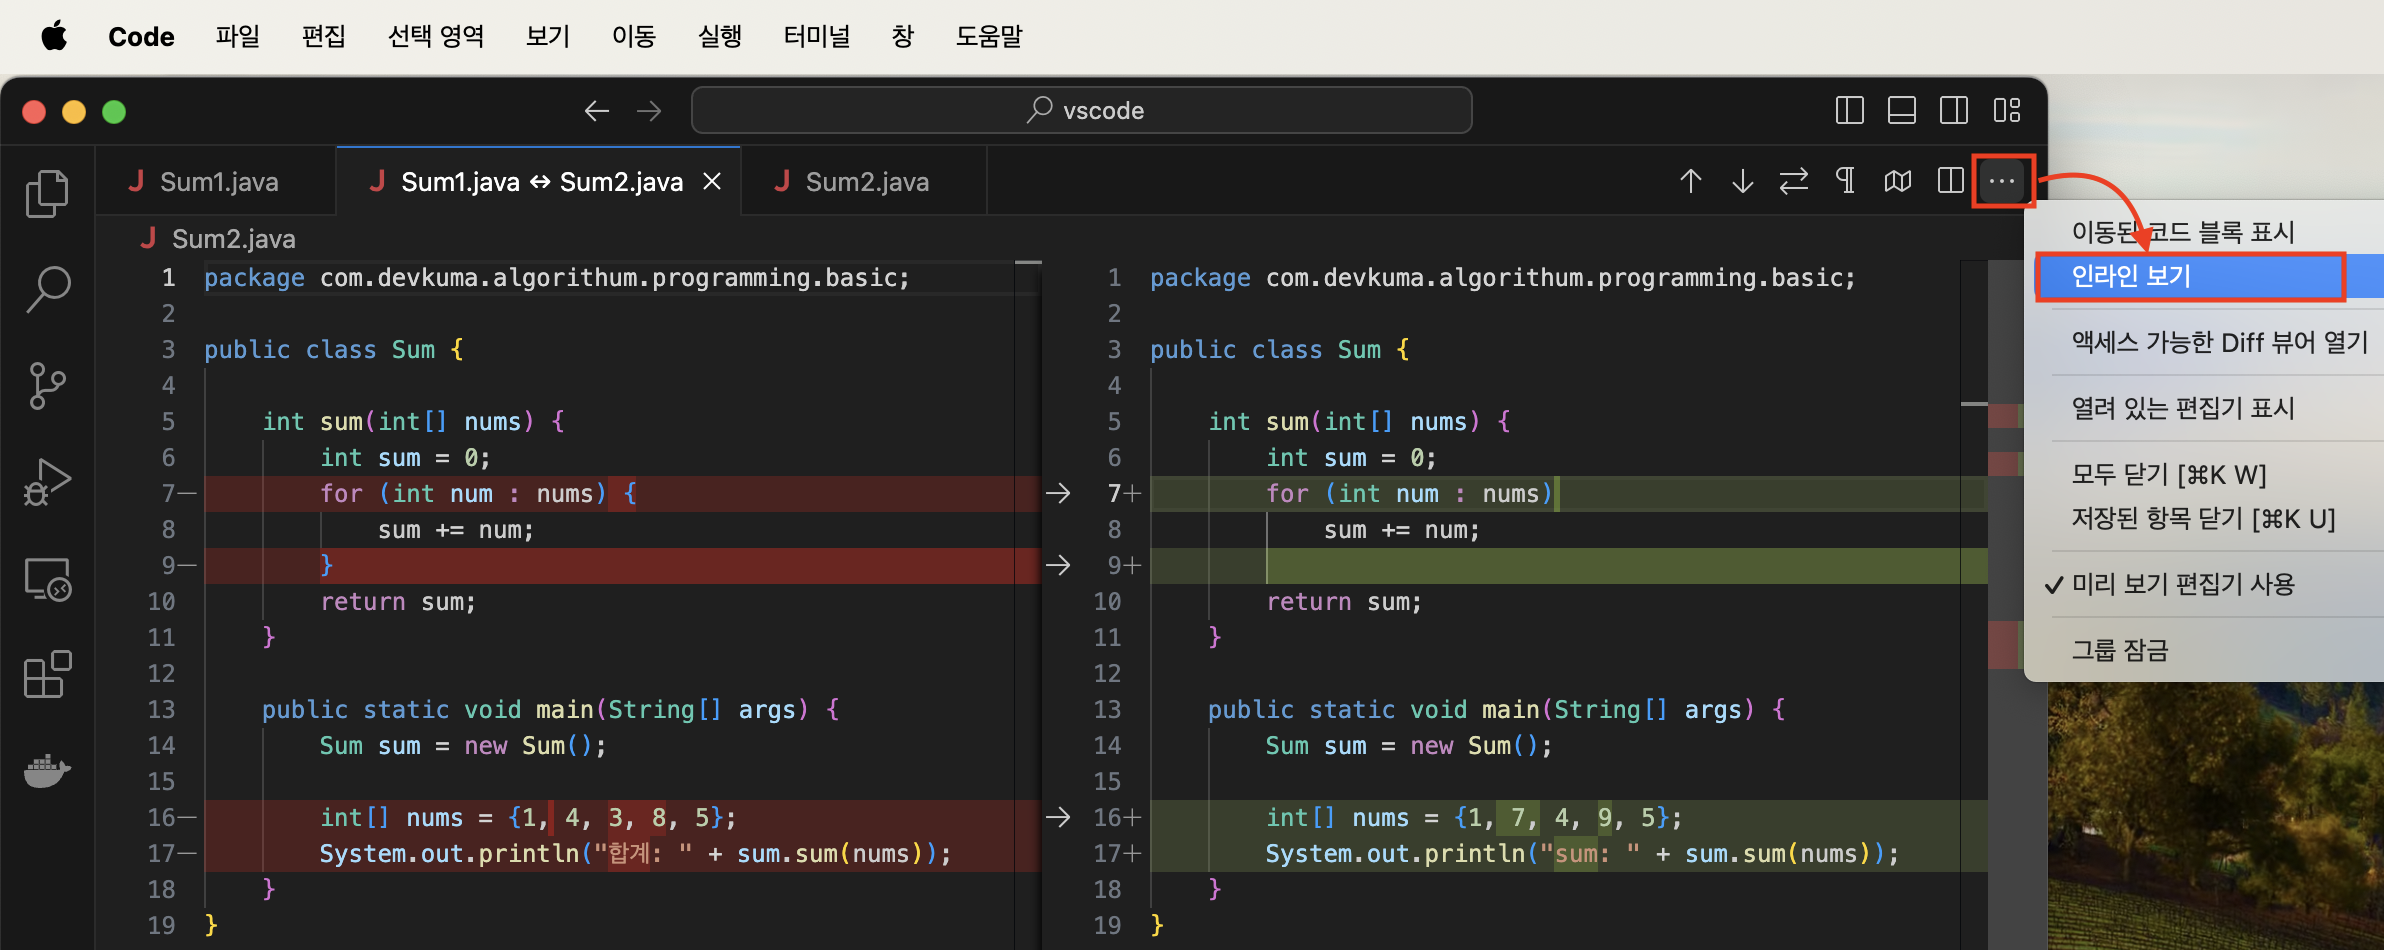
When you display file differences, the two files appear side by side. You can also use an inline view that shows only the differing sections together. Click “…” in the upper-right corner of the screen, then click “Inline View” in the displayed menu.
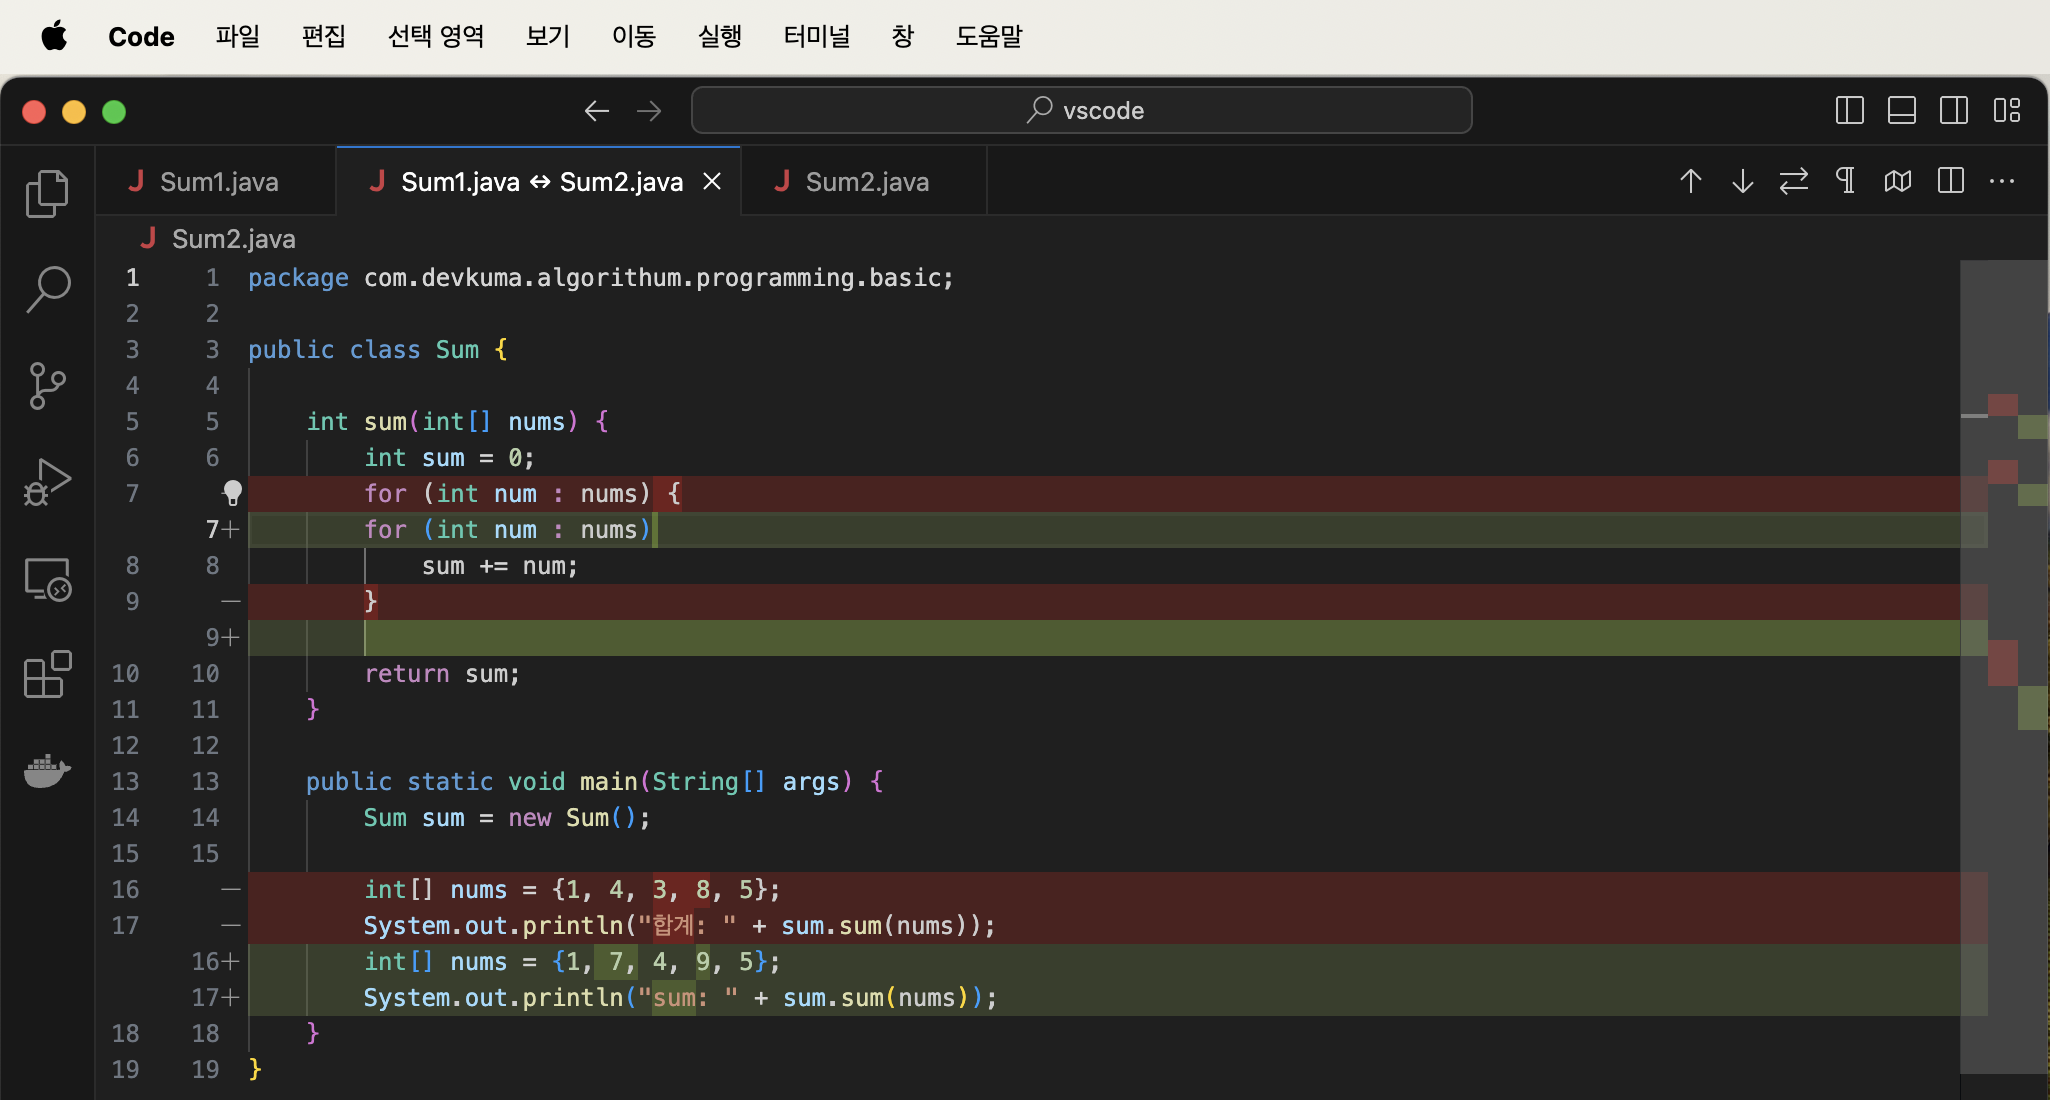
The different sections of the two files are displayed one above the other so you can compare them.
Displaying Differences Between Two Files from the Terminal
You can also start Visual Studio Code from the terminal. Run Visual Studio Code with the -d option to display a comparison of two files.
code -d [file1] [file2]
Now run the command. Open a terminal, move to the directory containing the files to compare, and run the following command.
code -d sum1.java sum2.java

Visual Studio Code starts and displays the differences between the two specified files.
This article explained how to compare the contents of two files and display their differences in Visual Studio Code.