Spring、Kotlinを使って簡単なStandard MCP Server(STDIO)を作る
はじめに
MCP Serverは、AIモデルが外部リソース(ツール、データ、APIなど)へアクセスできるようにするための標準化されたインターフェースを提供する役割を持つ。
MCPサーバーの概念については、次のドキュメントを参照してほしい。
AI用語 | MCP Server
この記事では、Springを使って簡単なMCP Serverを作成し、ClaudeからMCP Serverへ接続する方法を説明する。
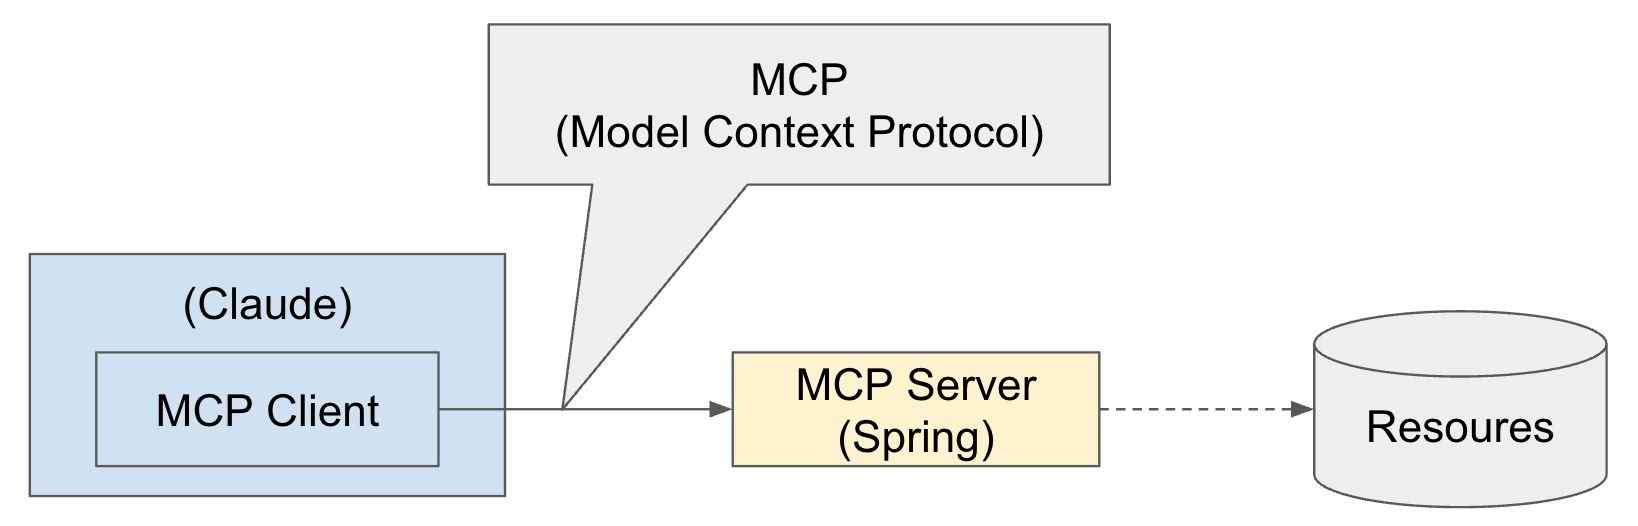
もちろん、Claude以外のAIツールを使うこともでき、MCP ServerもSpringでなくてもよい。MCPは文字どおりModel Context Protocol(モデルコンテキストプロトコル)に従うため、それが可能になる。
MCP Serverに接続されるResourcesには、DBやAPIなどさまざまなものを利用できる。この記事ではResourcesへの接続までは扱わない。
Spring AIのMCP Serverフレームワークは、サーバー転送方式に応じて次の3つのスターターをサポートしている。
- Standard MCP Server
- STDIOサーバー転送をサポート
org.springframework.ai:spring-ai-starter-mcp-server
- WebMVC Server転送
- Spring MVCベースのSSE(Server-Sent Events)サーバー転送と、オプションでSTDIO転送をサポート
org.springframework.ai:spring-ai-starter-mcp-server-webmvc
- WebFlux Server転送
- Spring WebFluxベースのSSE(Server-Sent Events)サーバー転送と、オプションでSTDIO転送をサポート
org.springframework.ai:spring-ai-starter-mcp-server-webflux
Springを使ったMCP Serverの実装
まず、SpringとKotlinを使った簡単なStandard MCP Server(STDIO)を作成する。
プロジェクト作成
プロジェクトはSpring Initializrで作成できる。
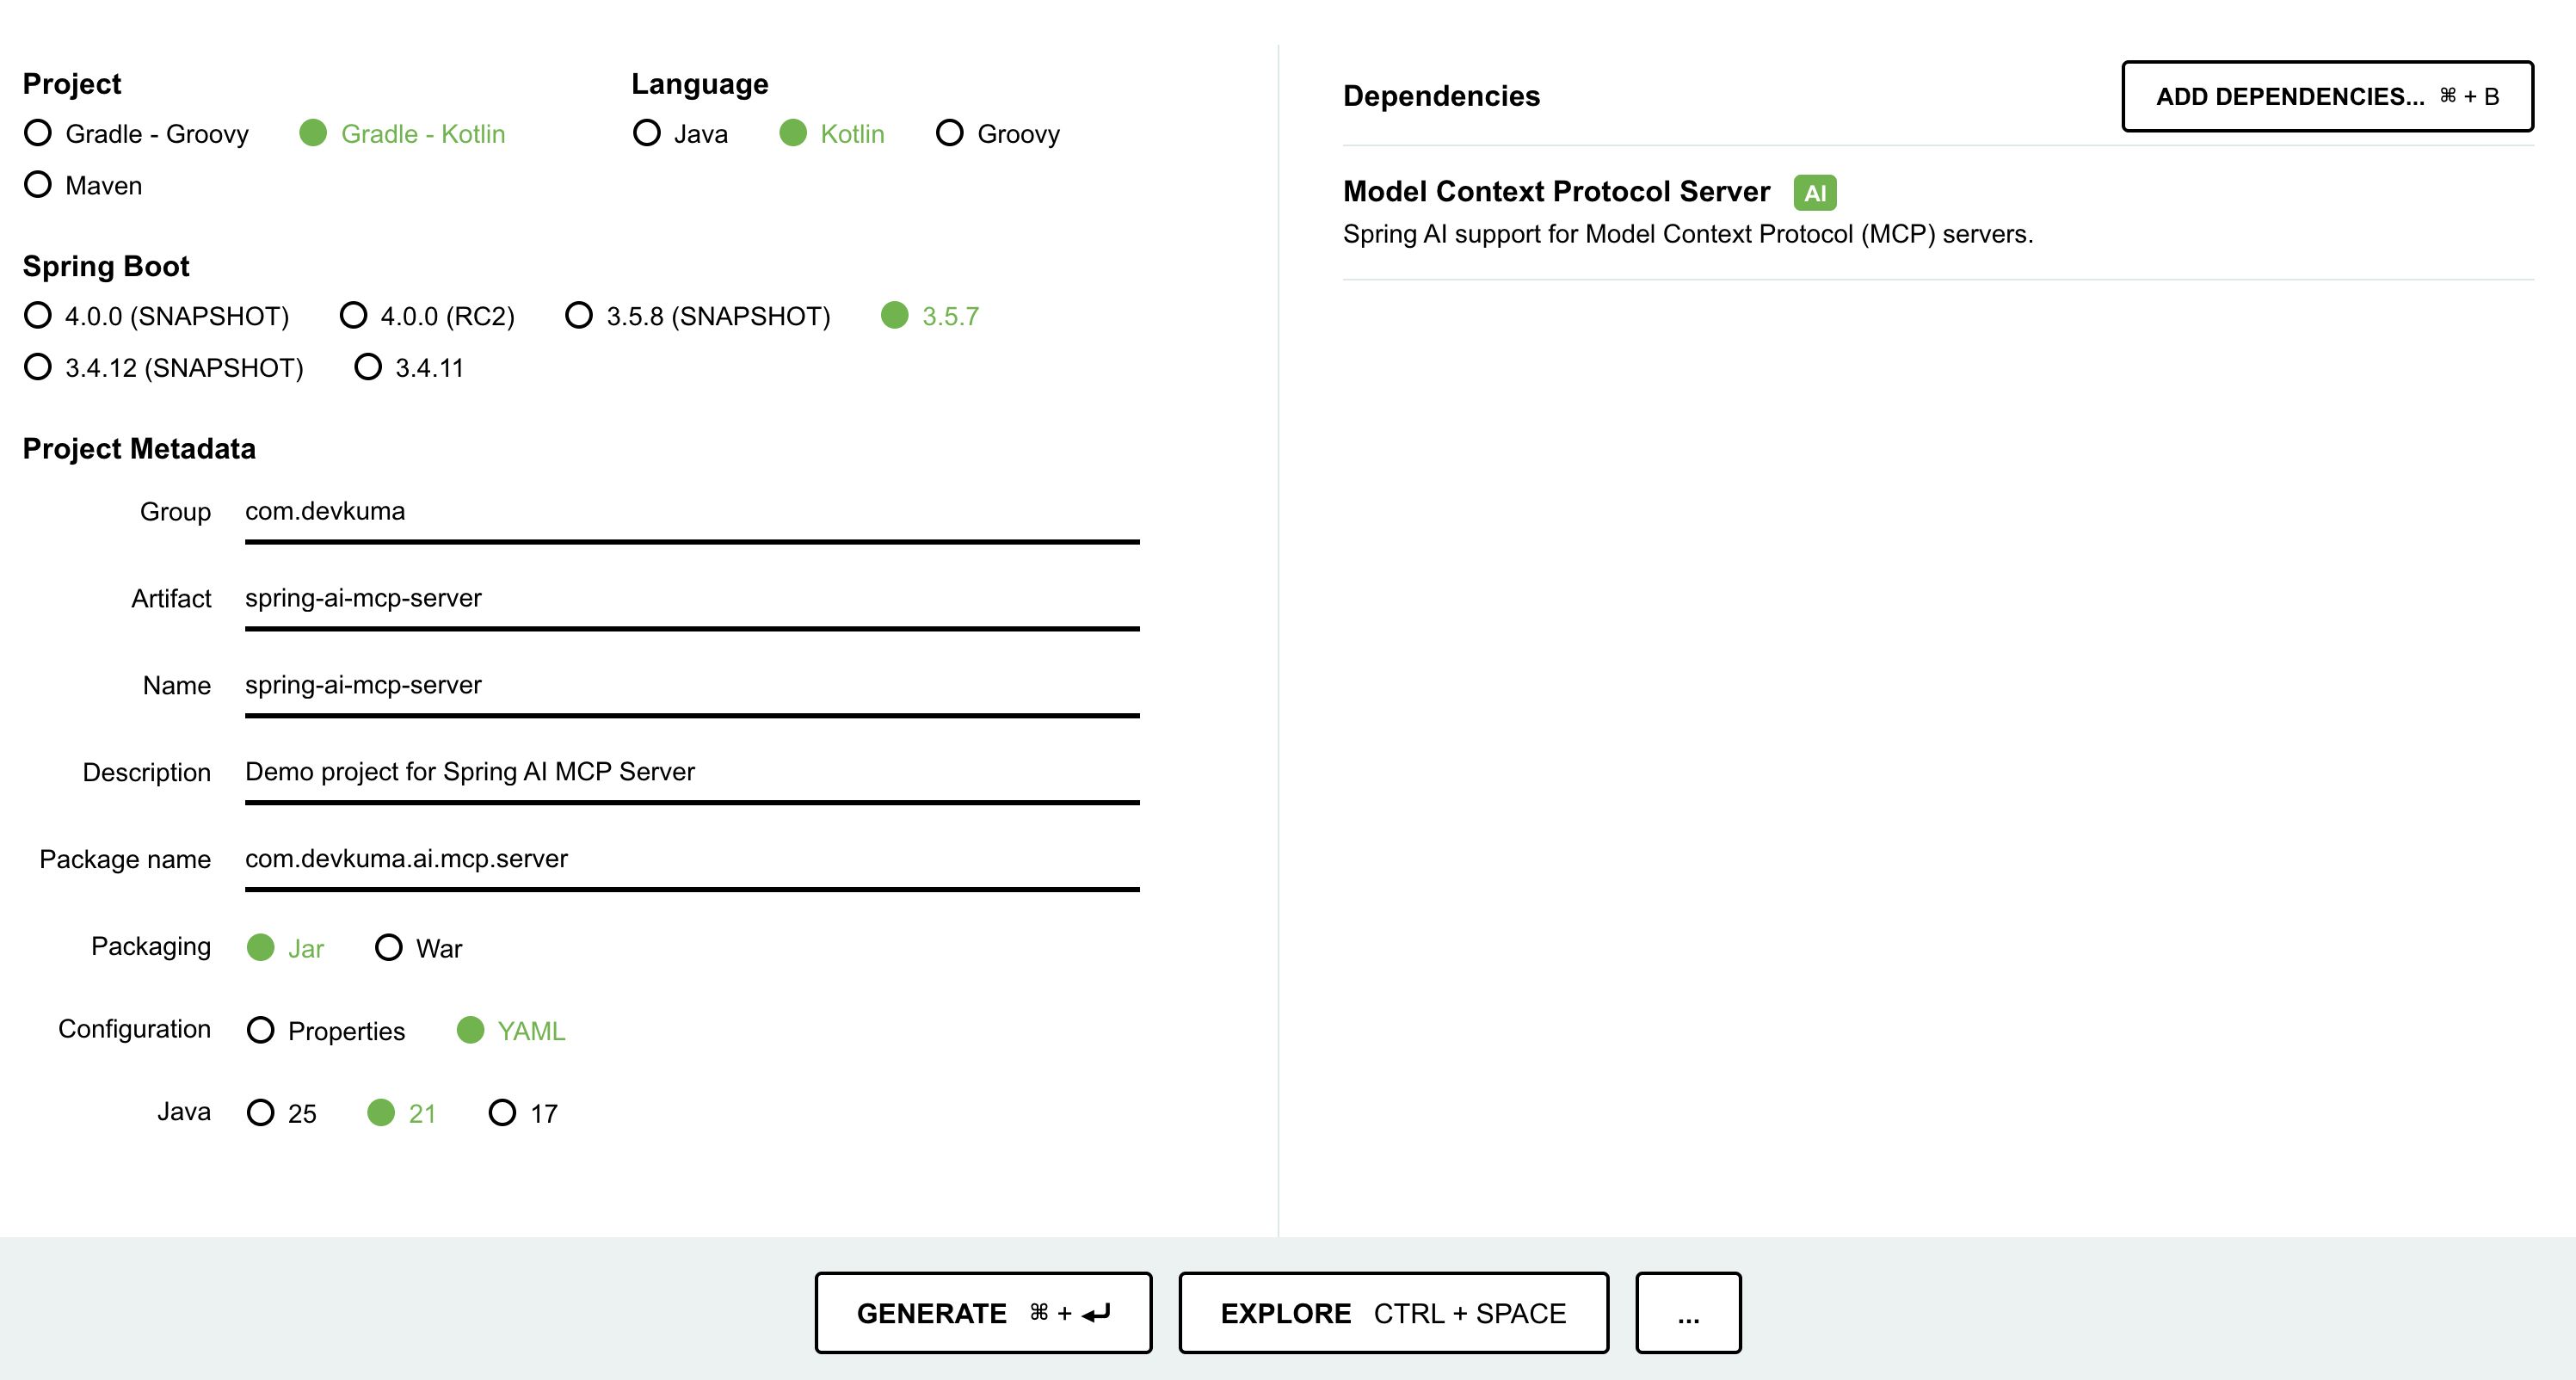
画面下部付近にある「GENERATE」ボタンを押すと、設定したプロジェクトファイルをダウンロードできる。
または、次のようにcurlコマンドを使ってSpring Bootの初期プロジェクトを作成することもできる。
curl https://start.spring.io/starter.tgz \
-d bootVersion=3.5.7 \
-d dependencies=spring-ai-mcp-server \
-d baseDir=spring-ai-mcp-server \
-d groupId=com.devkuma \
-d artifactId=spring-ai-mcp-server \
-d packageName=com.devkuma.ai.mcp.server \
-d applicationName=McpServerApplication \
-d packaging=jar \
-d language=kotlin \
-d javaVersion=21 \
-d description="Demo project for Spring AI MCP Server" \
-d type=gradle-project-kotlin | tar -xzvf -
生成されたプロジェクトの確認
ビルドスクリプト
依存ライブラリにSpring MVC Server(spring-ai-starter-mcp-server)ライブラリが含まれていることを確認できる。
/build.gradle.kts
dependencies {
	...
	implementation("org.springframework.ai:spring-ai-starter-mcp-server")
	...
}
Spring AIライブラリのバージョンは、特に変更しない場合は古いデフォルトバージョンが設定されるため、ここでは最新バージョンに修正する。
extra["springAiVersion"] = "1.1.0-M4"
最新バージョンはこちらで確認できる。
Serviceオブジェクト作成
MCP Clientから呼び出されるサービスオブジェクトを作成する。
/src/main/kotlin/com/devkuma/ai/mcp/server/WeatherService.kt
package com.devkuma.ai.mcp.server

import org.springframework.ai.tool.annotation.Tool
import org.springframework.ai.tool.annotation.ToolParam
import org.springframework.stereotype.Service

@Service
class WeatherService {

    @Tool(name = "get_weather", description = "Return the weather of a given city.")
    fun getWeather(@ToolParam(description = "The city for which to get the weather") city: String): String {
        // 実際の天気情報を取得するロジックを追加する。
        // ここでは簡単に"Good"を返す。
        return "The weather in $city is good."
    }
}
getWeather(..)関数では、パラメータとして都市(city)を受け取り、天気の状態を固定で"good"として返す。- ここでは応答値を固定しているが、実際には他のリソース(DB、APIなど)から情報を取得して応答すればよい。
@Toolに入れるToolの説明と、@ToolParamに入れるパラメータ説明は、後でMCPクライアントがサーバーに接続したとき、どのようなツールがあり、使い方がどうなっているかをクライアントへ知らせるために使える。
MCPサーバー設定オブジェクト作成
作成したServiceをSpring設定でAI Toolとして追加する。
/src/main/kotlin/com/devkuma/ai/mcp/server/McpConfig.kt
package com.devkuma.ai.mcp.server

import org.springframework.ai.tool.ToolCallbackProvider
import org.springframework.ai.tool.method.MethodToolCallbackProvider
import org.springframework.context.annotation.Bean
import org.springframework.context.annotation.Configuration

@Configuration
class McpConfig {

    @Bean
    fun weatherTools(weatherService: WeatherService): ToolCallbackProvider {
        return MethodToolCallbackProvider.builder().toolObjects(weatherService).build()
    }
}
アプリケーション設定ファイル
application.ymlを次のように作成する。(既存のapplication.propertiesがある場合は、YAMLファイルに変更する。)
/src/main/resources/application.yml
spring:
  main:
    web-application-type: none
    # NOTE: You must disable the banner and the console logging to allow the STDIO transport to work !!!
    banner-mode: off
  ai:
    mcp:
      server:
        name: my-weather-server
        version: 0.0.1

logging:
  pattern:
    console:
  file:
    name: ./log/spring-ai-starter-mcp-server.log
- ここで注意すべき点は、
banner-modeをoffに設定する必要があることだ。
ビルドと実行ファイル作成
コードの作成が完了したら、ビルドしてjarファイルを作成する。IDEAではGradleビルドでbootJarを実行する。
または、ターミナルで次のコマンドを実行する。
% ./gradlew clean bootJar
すると、jarファイルが次のパスに生成される。
build/libs/spring-ai-mcp-server-0.0.1-SNAPSHOT.jar
テスト用MCP Clientの実装
MCP Serverは完成したので、次にクライアントを実装する。
新しくStdioClient.ktファイルを作成する。
/test/kotlin/com/devkuma/ai/mcp/client/StdioClient.kt
package com.devkuma.ai.mcp.client

import io.modelcontextprotocol.client.McpClient
import io.modelcontextprotocol.client.transport.ServerParameters
import io.modelcontextprotocol.client.transport.StdioClientTransport
import io.modelcontextprotocol.json.McpJsonMapper
import io.modelcontextprotocol.spec.McpSchema.CallToolRequest

fun main() {

    val stdioParams = ServerParameters.builder("java")
        .args(
            "-Dspring.ai.mcp.server.stdio=true",
            "-Dspring.main.web-application-type=none",
            "-Dlogging.pattern.console=",
            "-jar",
            "build/libs/spring-ai-mcp-server-0.0.1-SNAPSHOT.jar"
        )
        .build()

    val transport = StdioClientTransport(stdioParams, McpJsonMapper.createDefault())
    val client = McpClient.sync(transport).build()

    client.initialize()

    // List and demonstrate tools
    val toolsList = client.listTools()
    println("Available Tools = $toolsList")

    val alertResult = client.callTool(CallToolRequest("get_weather", mapOf("city" to "seoul")))
    println("get_weather Response = $alertResult")

    client.closeGracefully()
}
- コードを見ると、
javaコマンドでjarを実行するstdioParamsを設定し、StdioClientTransport作成時に引数として渡している。 - クライアントを実行すると、STDIOでMCP Serverが起動する。
Output:
... 省略 ...

Available Tools = ListToolsResult[tools=[Tool[name=get_weather, title=null, description=Return the weather of a given city., inputSchema=JsonSchema[type=object, properties={city={type=string, description=The city for which to get the weather}}, required=[city], additionalProperties=false, defs=null, definitions=null], outputSchema=null, annotations=null, meta=null]], nextCursor=null, meta=null]
get_weather Response = CallToolResult[content=[TextContent[annotations=null, text="The weather in seoul is good.", meta=null]], isError=false, structuredContent=null, meta=null]

... 省略 ...
- 実行結果には利用可能なTool一覧が表示され、
get_weatherツールを呼び出して応答値を受け取れたことを確認できる。
ClaudeからMCP Serverへ接続
ビルドまで完了したら、Claude DesktopにMCP Serverを接続し、正しく適用されているか確認する。
接続設定
MCP Serverの接続設定はJSONファイルに登録する必要がある。
macOSの場合は、~/Library/Application Support/Claude/claude_desktop_config.jsonに設定する。(ファイルがなければ新規作成し、すでにあれば追加する。)
{
  "mcpServers": {
    "spring-ai-mcp-weather": {
      "command": "java",
      "args": [
        "-Dspring.ai.mcp.server.stdio=true",
        "-Dspring.main.web-application-type=none",
        "-Dlogging.pattern.console=",
        "-jar",
        "{{前で作成したプロジェクトのパス}}/spring-ai-mcp-server/build/libs/spring-ai-mcp-server-0.0.1-SNAPSHOT.jar"
      ]
    }
  }
}
作成したアプリケーションはJavaコマンドで実行され、起動したサーバーはstdioを通じてClaude Desktopと接続される。
接続設定の確認
Claudeを起動し、メニューから「Claude > Settings > Developer」を確認すると、ローカルMCPサーバーが追加されていることを確認できる。
(ここでエラーが発生した場合はログボタンが表示されるので、そのボタンをクリックして内容を確認すればよい。)
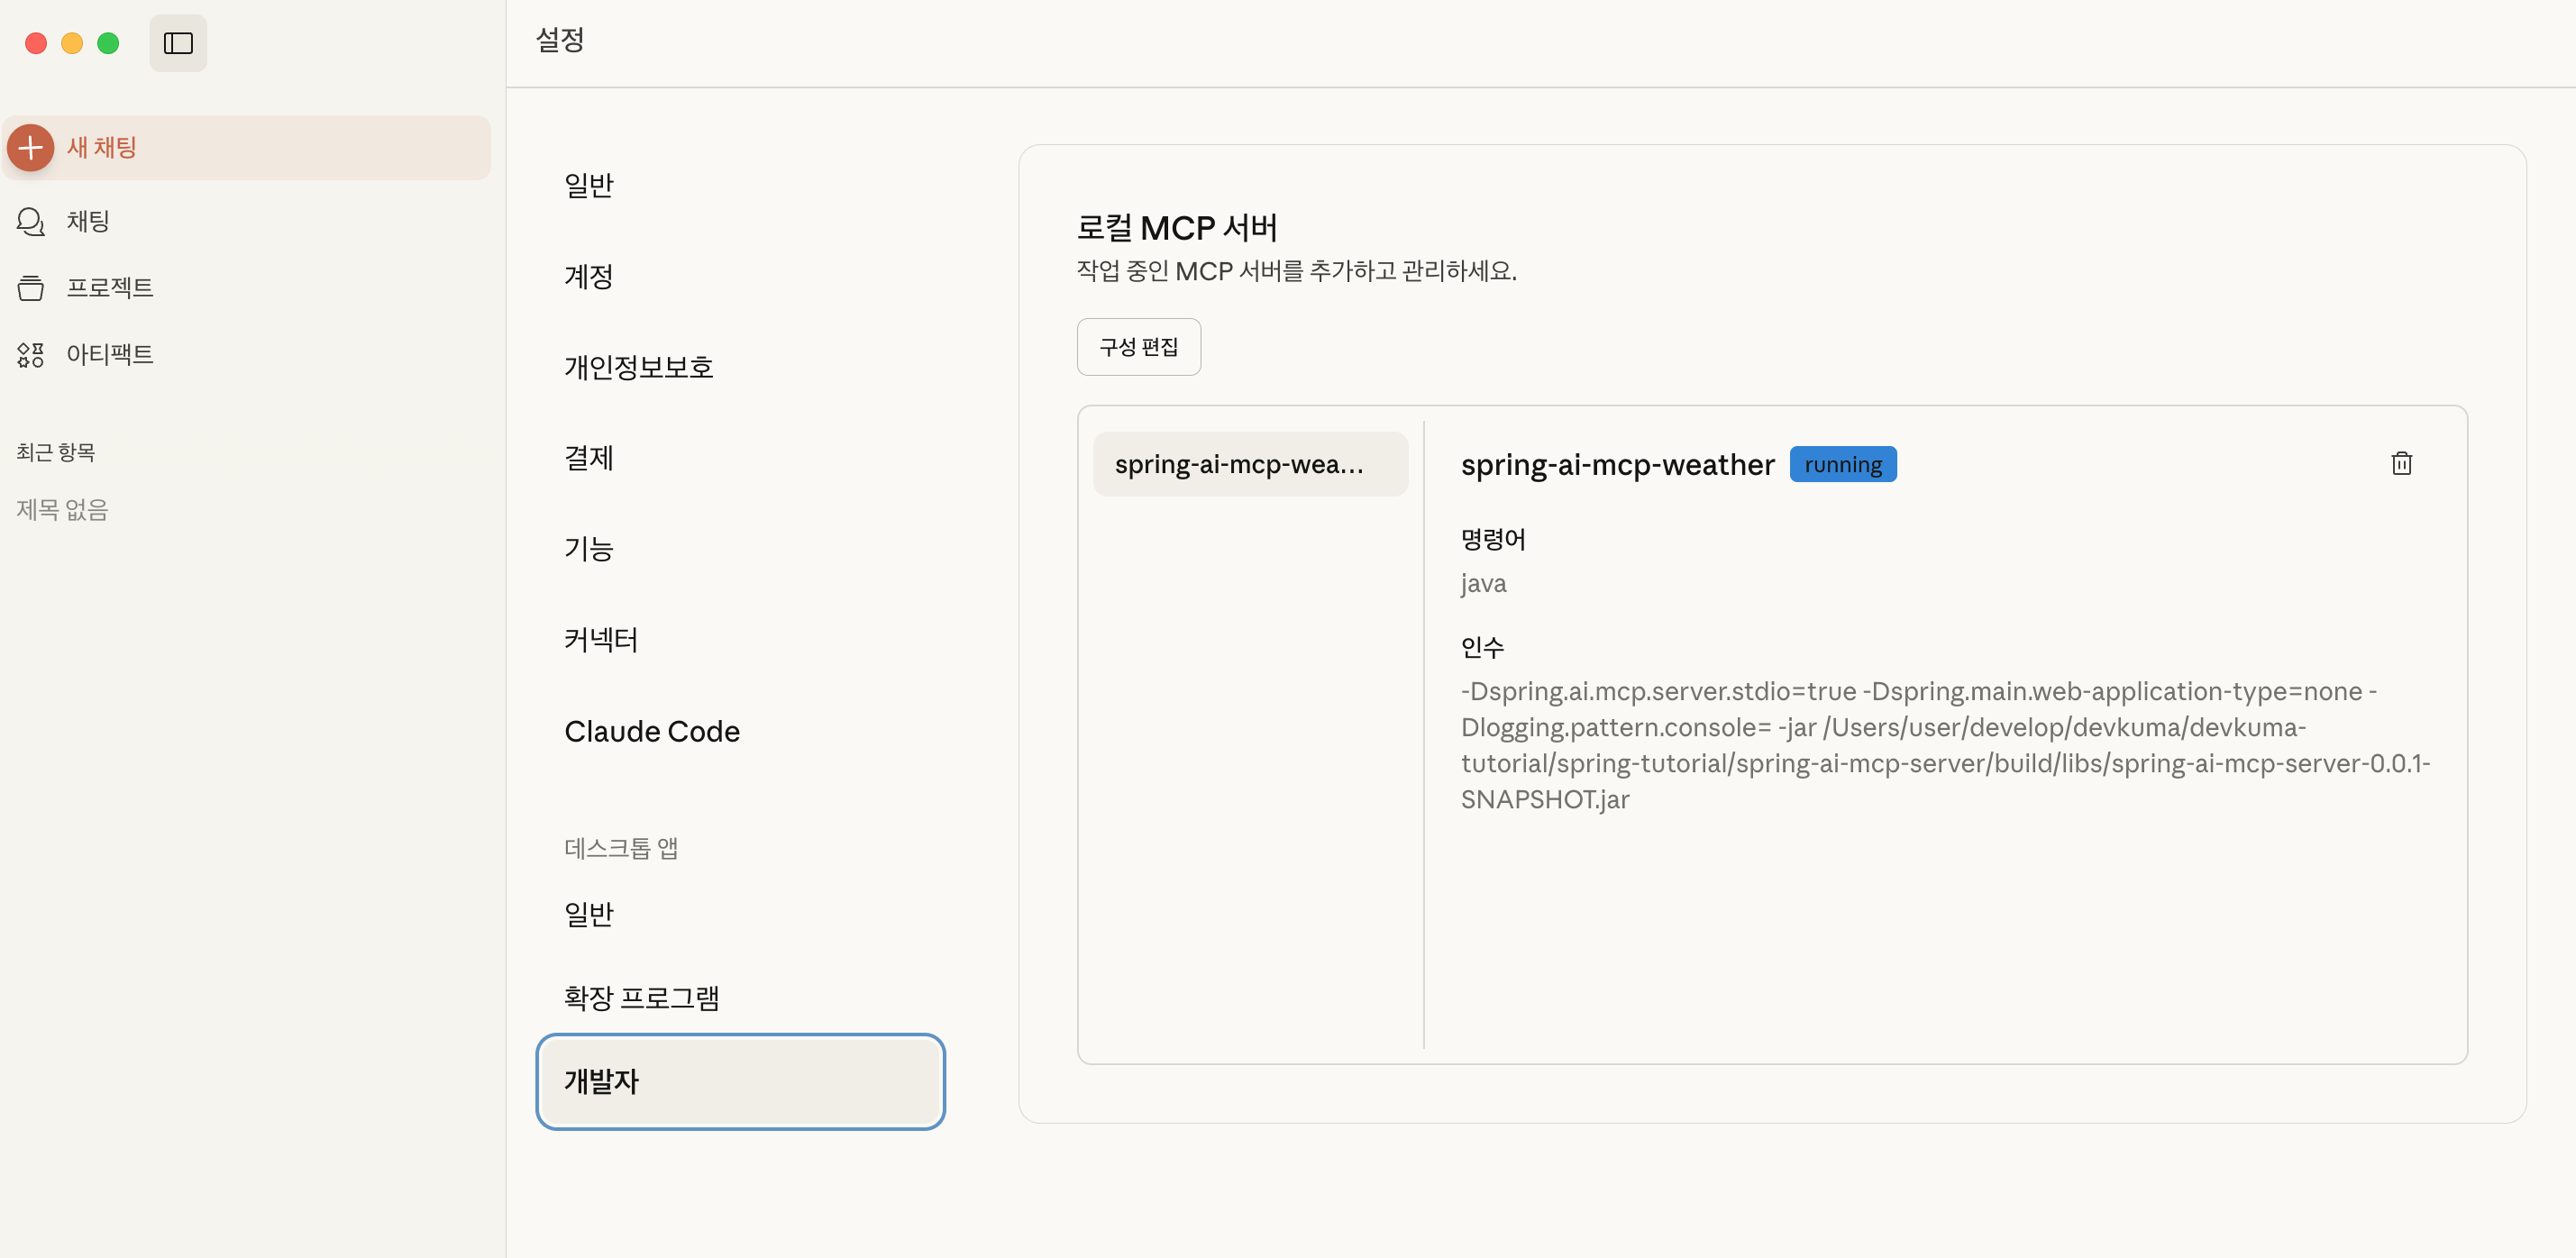
チャット画面では、設定ボタンを押すと「spring-ai-mcp-wearther」が有効になっていることを確認できる。

実行確認
接続できたことを確認したので、入力してみる。
下の画面では「ソウルの天気はどう?」と入力している。
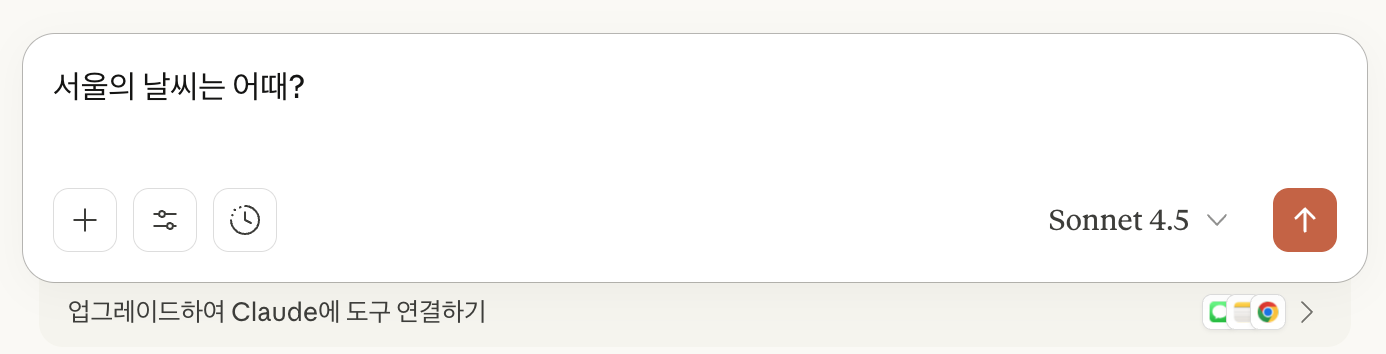
すると、「Claude wants to use Get weather from spring-ai-mcp-weather」というメッセージとともに、許可するかどうかを確認される。
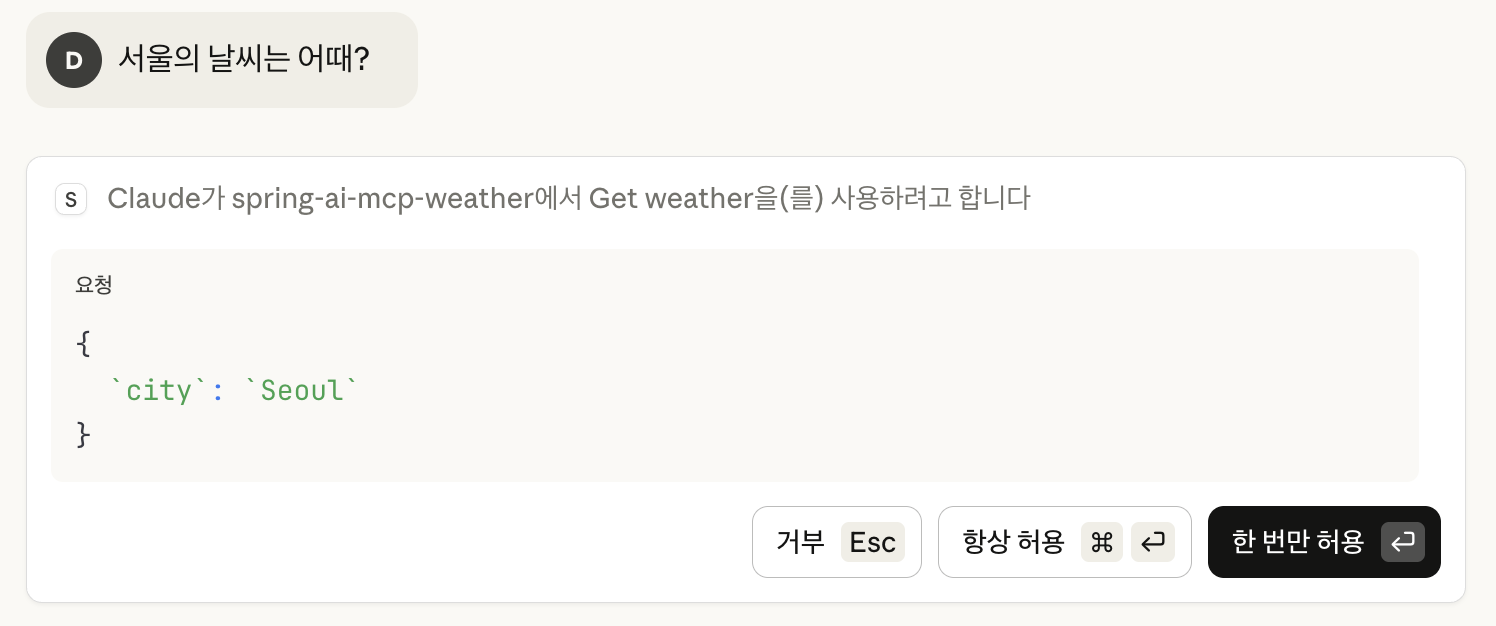
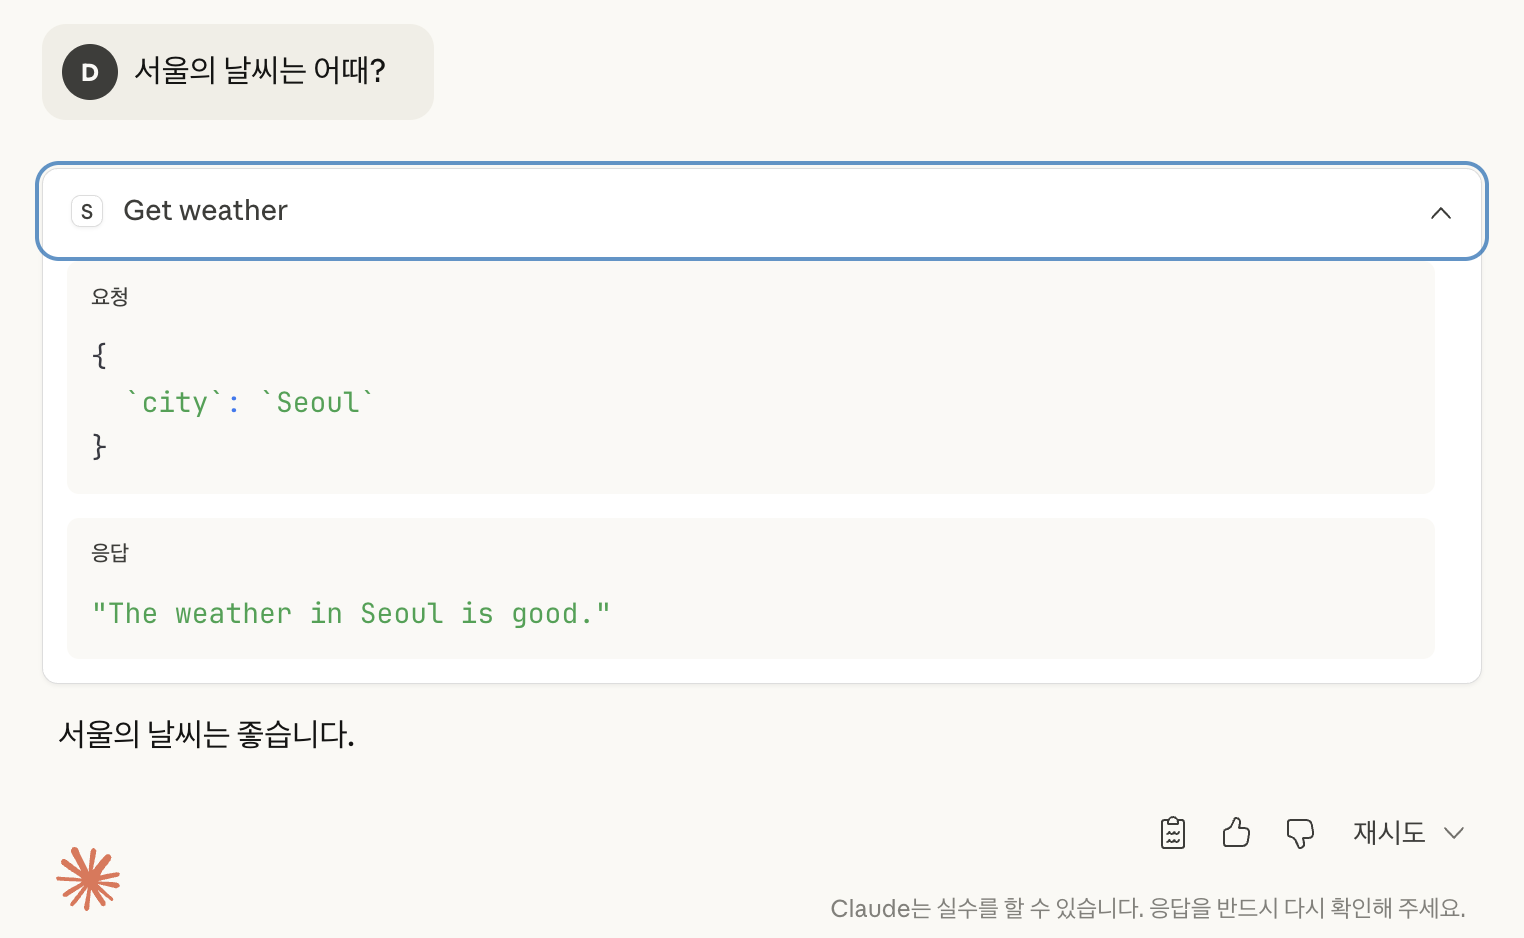
許可ボタンを押すと、応答として「ソウルの天気は良いです。」と返されることを確認できる。
「Get weather」を押すと、リクエストとレスポンスについても確認できる。
参考
- 조대협의 블로그:티스토리 | MCP (Model Context Protocol) 2. 서버 개발하기
- Spring | Model Context Protocol (MCP)
- GitHub | spring-ai-examples | starter-stdio-server
上記のサンプルコードはGitHubで確認できる。