Writing Basic Kotest Tests
Writing Test Code
After Kotest installation and setup are complete, let’s look at how to write test code.
The language features provided by Kotlin make it possible to define tests with a more powerful and simple approach. The days when tests had to be defined as methods in Java files are gone.
In Kotest, a test is essentially just a TestContext -> Unit function that contains test logic. Any assertion statement, called a matcher in Kotest terminology, that throws an exception in this function is intercepted by the framework and used to mark the test as failed or successful.
Test functions are not defined manually. They are defined through the Kotest DSL, which provides several ways to create and nest these functions. The DSL is written by creating a class that extends a class implementing a specific testing style.
Create a test class in the desired path, then extend the Spec class for the testing style.
For example, to use the Fun Spec style, extend the FunSpec class and create a test function with the test keyword, a name, and the actual test function.
class MyFirstTestClass : FunSpec({

   test("my first test") {
      1 + 2 shouldBe 3
   }

})
There are two main ways to write the inside of test code: writing it with a DSL (Domain-Specific Language), and using an init {} block.
The following sections explain both methods.
Writing with the DSL
First, let’s explain how to write tests with a DSL (Domain-Specific Language).
Kotest provides a DSL for writing tests. Using this DSL lets you express tests more naturally.
Each testing style provides its own DSL, and you can use it to structure tests. For example, StringSpec, WordSpec, and FunSpec each provide a DSL that defines tests using strings, words, or functions.
These DSLs are convenient for structuring and expressing tests, and they improve readability and maintainability.
import io.kotest.core.spec.style.StringSpec

class MyStringSpec : StringSpec({
    "This is a test" {
        // Write test code
    }
})
Writing with an init Block
Kotlin’s init block can be used to initialize and configure tests. This is generally used when more flexibility is needed.
The init block is located inside the test class constructor and is initialized when the class is instantiated. Therefore, it can be shared by all methods in the test class.
import io.kotest.core.spec.style.StringSpec

class MyStringSpec : StringSpec() {
    init {
        "This is a test" {
            // Write test code
        }
    }
}
The DSL and init block are chosen according to different use cases and developer preferences. Use the DSL when you want to write more structured tests, and use an init block when specific setup is required.
Nested Tests
Most styles provide the ability to nest tests. The actual syntax differs by style, but the basic difference is the keyword used for the outer test.
For example, in Describe Spec, the outer test is created with the describe function, and the inner test is created with the it function. JavaScript and Ruby developers can recognize this style immediately because it is commonly used in those languages’ testing frameworks.
class NestedTestExamples : DescribeSpec({

   describe("an outer test") {

      it("an inner test") {
        1 + 2 shouldBe 3
      }

      it("an inner test too!") {
        3 + 4 shouldBe 7
      }
   }

})
In Kotest terminology, tests that can contain other tests are called test containers, and terminal or leaf-node tests are called test cases. Both can contain test logic and assertions.
Dynamic Tests
Tests are just functions, so they are evaluated at runtime.
This approach provides the significant advantage of allowing tests to be generated dynamically. Unlike traditional JVM testing frameworks, where tests are always methods and are declared at compile time, Kotest can add tests conditionally at runtime.
For example, you can add tests based on elements in a list.
class DynamicTests : FunSpec({

    listOf(
      "sam",
      "pam",
      "tim",
    ).forEach {
       test("$it should be a three letter name") {
           it.shouldHaveLength(3)
       }
    }
})
This creates three tests at runtime. It is equivalent to writing the following:
class DynamicTests : FunSpec({

   test("sam should be a three letter name") {
      "sam".shouldHaveLength(3)
   }

   test("pam should be a three letter name") {
      "pam".shouldHaveLength(3)
   }

   test("tim should be a three letter name") {
     "tim".shouldHaveLength(3)
   }
})
Lifecycle Callbacks
Kotest provides several callbacks that are invoked at various points during the test lifecycle. These callbacks are useful for resetting state, setting up resources used by tests, and releasing those resources.
As mentioned earlier, Kotest test functions are labeled as test containers or test cases, and the containing class is labeled as a spec. You can register callbacks that are invoked before or after a test function, container, test case, or the spec itself.
To register a callback, simply pass a function to one of the callback methods.
For example, you can add callbacks before and after a test case using function literals:
class Callbacks : FunSpec({

   beforeEach {
      println("Hello from $it")
   }

   test("sam should be a three letter name") {
      "sam".shouldHaveLength(3)
   }

   afterEach {
      println("Goodbye from $it")
   }
})
The order of callbacks in the file does not matter. For example, you can place the afterEach block first in the class if you want.
To extract common code, create a named function and reuse it across multiple files. For example, if you want to reset the database before every test in two or more files, you can do this:
val resetDatabase: BeforeTest = {
  // truncate all tables here
}

class ReusableCallbacks : FunSpec({

   beforeTest(resetDatabase)

   test("this test will have a sparkling clean database!") {
       // test logic here
   }
})
For more information about all callbacks and when they are invoked, see Lifecycle Hooks and Extensions.
Assertions and Matchers
Kotest provides many matchers that can validate test results. They let you compare expected and actual results to confirm whether a test succeeded. For example, in the sample above, result shouldBe 2 is an assertion that verifies whether result is equal to 2.
Many other matchers exist. The following is sample code that uses some major matchers with Kotest.
package com.devkuma.kotest.tutorial.assertions

import io.kotest.core.spec.style.FreeSpec
import io.kotest.matchers.collections.shouldContain
import io.kotest.matchers.collections.shouldContainAll
import io.kotest.matchers.collections.shouldContainExactly
import io.kotest.matchers.collections.shouldNotContain
import io.kotest.matchers.ints.shouldBeGreaterThan
import io.kotest.matchers.ints.shouldBeInRange
import io.kotest.matchers.ints.shouldBeLessThan
import io.kotest.matchers.shouldBe
import io.kotest.matchers.shouldNotBe
import io.kotest.matchers.string.shouldBeBlank
import io.kotest.matchers.string.shouldBeEqualIgnoringCase

class MatchersTest : FreeSpec({

    "Matchers" - {
        val number = 10
        "checks whether the value is the same as the expected value" {
            number shouldBe 10
        }

        "checks whether the value is different from the expected value" {
            number shouldNotBe 20
        }

        val blankString = ""
        "checks whether the string consists only of whitespace" {
            blankString.shouldBeBlank()
        }

        val numbers = listOf(1, 2, 3, 4, 5)

        "checks whether the collection contains the specified element" {
            numbers shouldContain 3
        }

        "checks whether the collection does not contain the specified element" {
            numbers shouldNotContain 6
        }

        "checks whether the collection contains all specified elements" {
            numbers shouldContainAll listOf(2, 4)
        }

        "checks whether the collection exactly matches the specified elements" {
            numbers.shouldContainExactly(1, 2, 3, 4, 5)
        }

        val value = 10
        "checks whether the value is in the specified range" {
            value shouldBeInRange 5..15
        }

        "checks whether the value is greater than the specified value" {
            value shouldBeGreaterThan 5
        }

        "checks whether the value is less than the specified value" {
            value shouldBeLessThan 15
        }

        val message = "Hello, Kotest"
        "checks equality ignoring case" {
            message shouldBeEqualIgnoringCase "HELLO, KOTEST"
        }
    }
})
There are many more matchers, and they will be explained in detail later.
Test Execution and Reports
To run tests, you can run them from the IDE or use Gradle or Maven. After running tests, you can check reports for the test results. Kotest records test results in detail and generates reports so developers can understand the state of their tests.
To run a test, run the relevant test class or file in the IDE, or run tests using Gradle or Maven. After test execution, you can check the result of each test case in report form. Kotest provides detailed reports for executed tests so you can understand whether tests succeeded or failed.
Running Tests in IntelliJ IDEA
In IntelliJ IDEA, select the test class or file and choose the Kotest tab on the left. The test cases will be displayed as shown below.
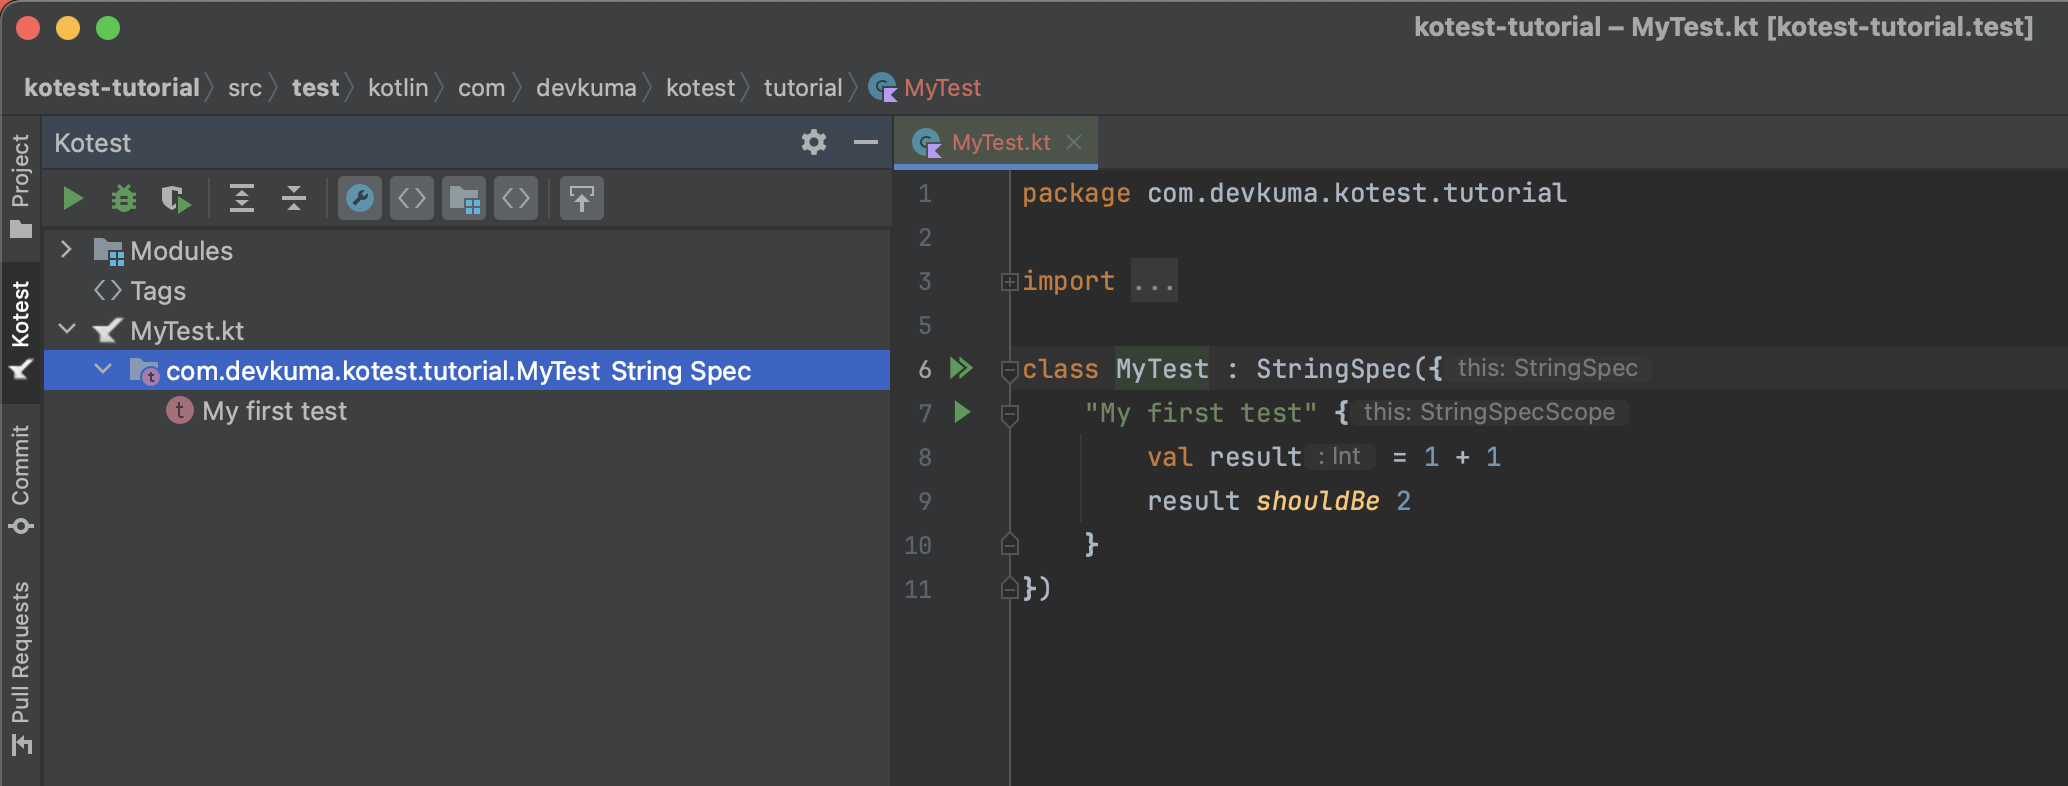
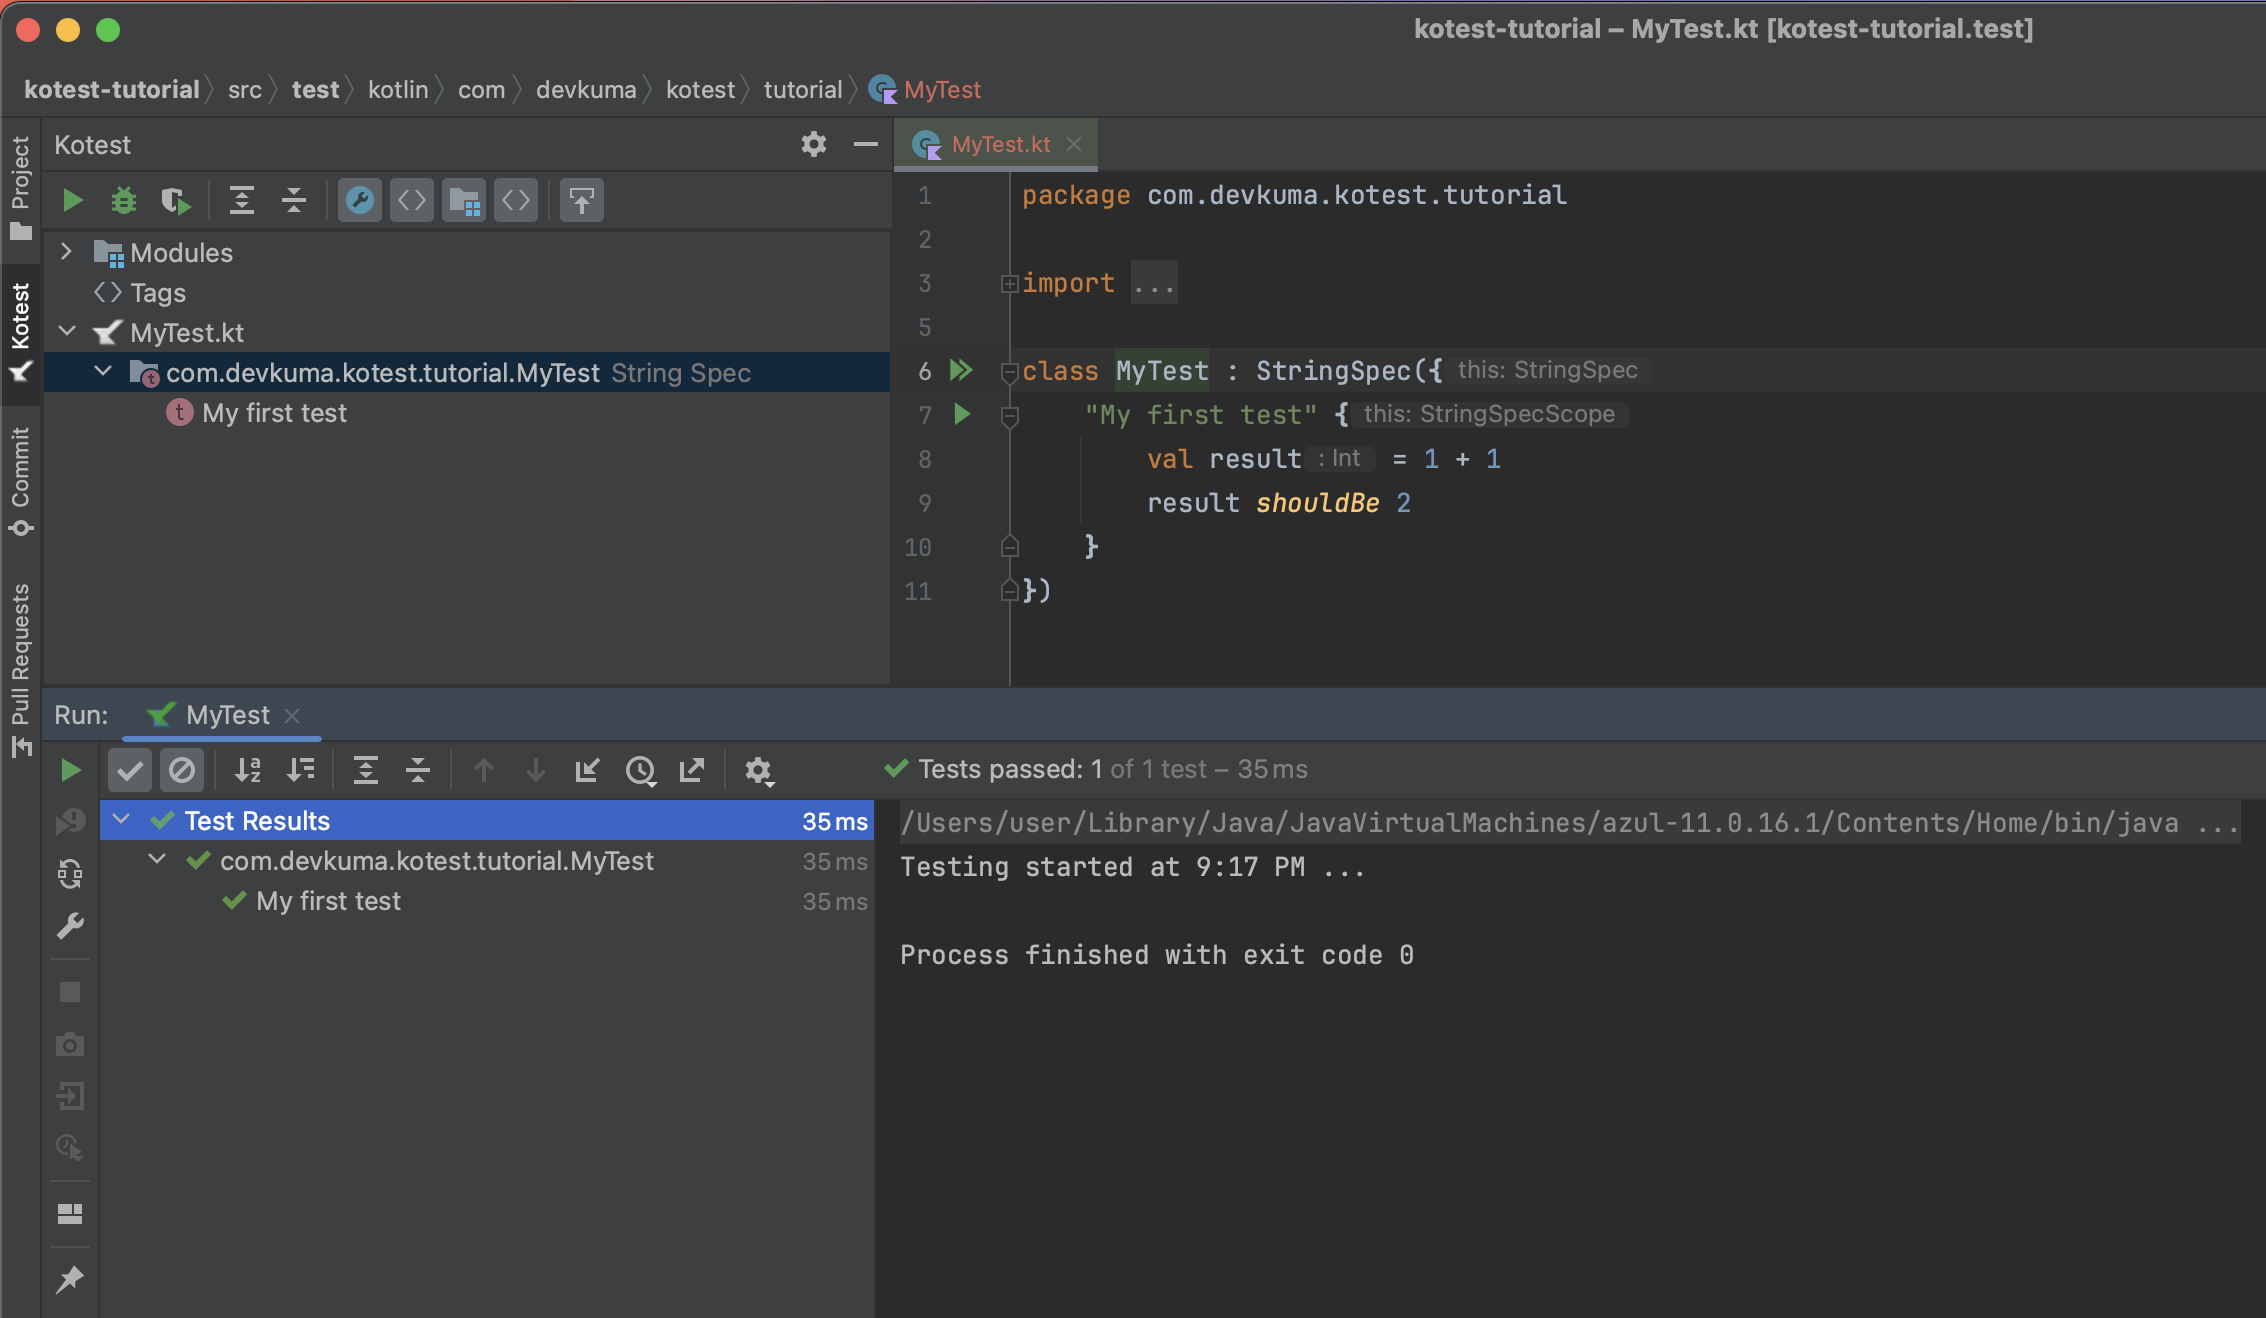
Select the displayed test case and press the Run button. You can then confirm that the test code runs as shown below.
Running Gradle Tests
The following explains how to run Kotest through Gradle.
Running the Test Command
Move to the project directory in a terminal or command window, then run the following command to execute the project’s tests with Gradle.
./gradlew test
When execution completes, the test results are printed in the terminal. If the tests pass, the BUILD SUCCESSFUL message is printed as shown below.
% ./gradlew test

BUILD SUCCESSFUL in 548ms
3 actionable tasks: 3 up-to-date
If a test fails, the BUILD FAILED message is printed.
 % ./gradlew test

BUILD SUCCESSFUL in 28s
3 actionable tasks: 3 executed
user@AL02263852 kotest-tutorial % ./gradlew test

> Task :test

com.devkuma.kotest.tutorial.MyTest > My first test FAILED
    io.kotest.assertions.AssertionFailedError at MyTest.kt:9

58 tests completed, 1 failed, 8 skipped

> Task :test FAILED

FAILURE: Build failed with an exception.

* What went wrong:
Execution failed for task ':test'.
> There were failing tests. See the report at: file:///Users/user/develop/kotlin-tutorial/kotest-tutorial/build/reports/tests/test/index.html

* Try:
> Run with --scan to get full insights.

BUILD FAILED in 26s
3 actionable tasks: 2 executed, 1 up-to-date
Checking the Test Report
After running tests, you can view the generated HTML test report in the build/reports/tests directory to examine the results in detail.
In the failed example above, the test report link is shown as follows.
> There were failing tests. See the report at: file:///Users/user/develop/kotlin-tutorial/kotest-tutorial/build/reports/tests/test/index.html
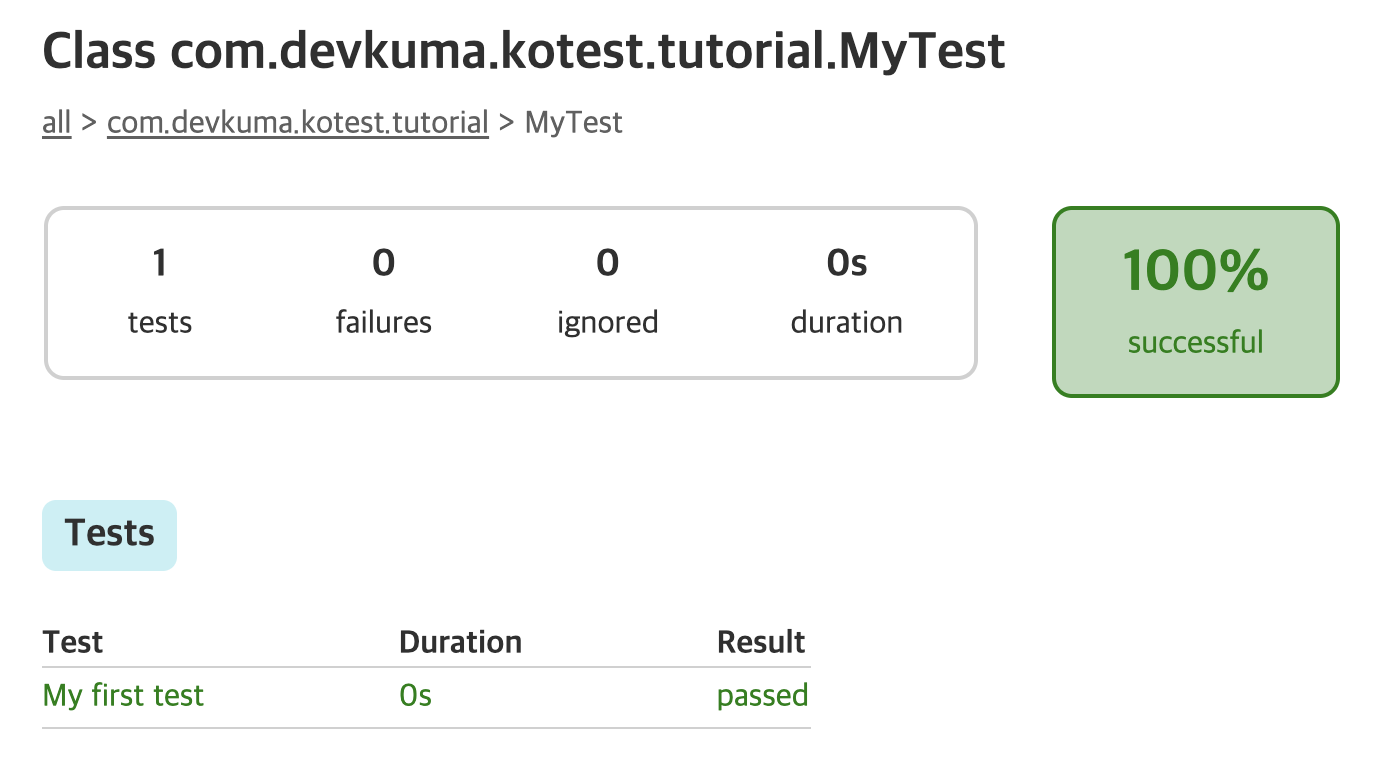
Open this file in a browser, and it will appear as shown below.
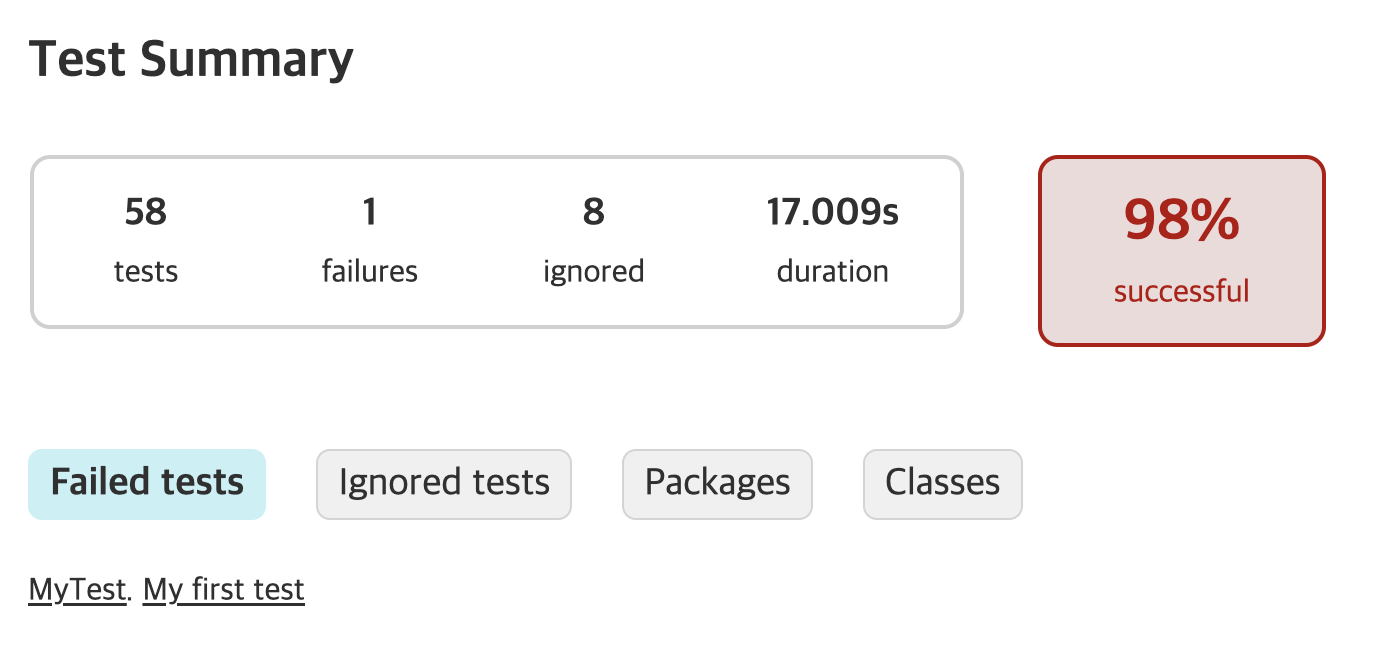
The number of executed tests and the number of failed tests are shown in detail.
Even when tests succeed, the file is created in the same location, although the command output does not print the report link.
As shown here, Kotest lets you perform tests easily and efficiently with simple setup and test code. In the next sections, we will cover more Kotest features and usage patterns.