Creating a New Hugo Website
Creating the Site Skeleton
First, install Hugo and prepare an environment where the hugo command can be used.
Then, as shown below, use the hugo new site command to create the initial directory skeleton for the website.
Create a new website (my-site)
% hugo new site my-site
Congratulations! Your new Hugo site is created in /Users/user/hugo-tutorial/my-site.

Just a few more steps and you're ready to go:

1. Download a theme into the same-named folder.
   Choose a theme from https://themes.gohugo.io/ or
   create your own with the "hugo new theme <THEMENAME>" command.
2. Perhaps you want to add some content. You can add single files
   with "hugo new <SECTIONNAME>/<FILENAME>.<FORMAT>".
3. Start the built-in live server via "hugo server".

Visit https://gohugo.io/ for quickstart guide and full documentation.
The generated files are very simple: only two files and a few directories, as shown below.
.
└── my-site
    ├── archetypes     : Template files used when creating new pages
    │   └── default.md
    ├── config.toml    : Site-wide configuration file
    ├── content        : Location for content. Place Markdown files that become site content here.
    ├── data           : Data used when generating the site
    ├── layouts        : Location for layout templates
    ├── public         : Location for generated HTML, CSS, images, and other deployed files
    ├── static         : Location for files, such as images, copied as-is during site generation
    └── themes         : Location for theme directories. The actual theme to use is specified in config.toml.
If you start the server in this state, it shows “Page Not Found”.
Installing and Configuring a Site Theme
After creating a new website in Hugo, configure a theme that defines its appearance. A site created with hugo new site does not include a theme, so you need to download one from the themes published on the site.
Here, we will apply a theme called mainroad.
Hugo themes can be stored by creating a theme directory under the themes directory. Because each theme is stored in a separate directory, you can download several themes in advance and easily switch the theme you use.
Themes are usually distributed on GitHub, so if Git is installed, you can apply one easily with git clone from the root path as follows.
% cd themes
% git clone https://github.com/vimux/mainroad
Or you can run the command all at once as follows.
% git clone https://github.com/vimux/mainroad themes/mainroad
If the themes/mainroad directory was created by the command above, next add the following content to the Hugo configuration file (config.toml) so that this theme is used.
config.toml
theme = "mainroad"
This completes the theme configuration.
Setting the Site Title and Language
In the site configuration file, in addition to the theme setting, you should configure the site title (title) and the language used by the whole site (languageCode).
config.toml
baseURL = "http://devkuma.com/"
languageCode = "ko-kr"
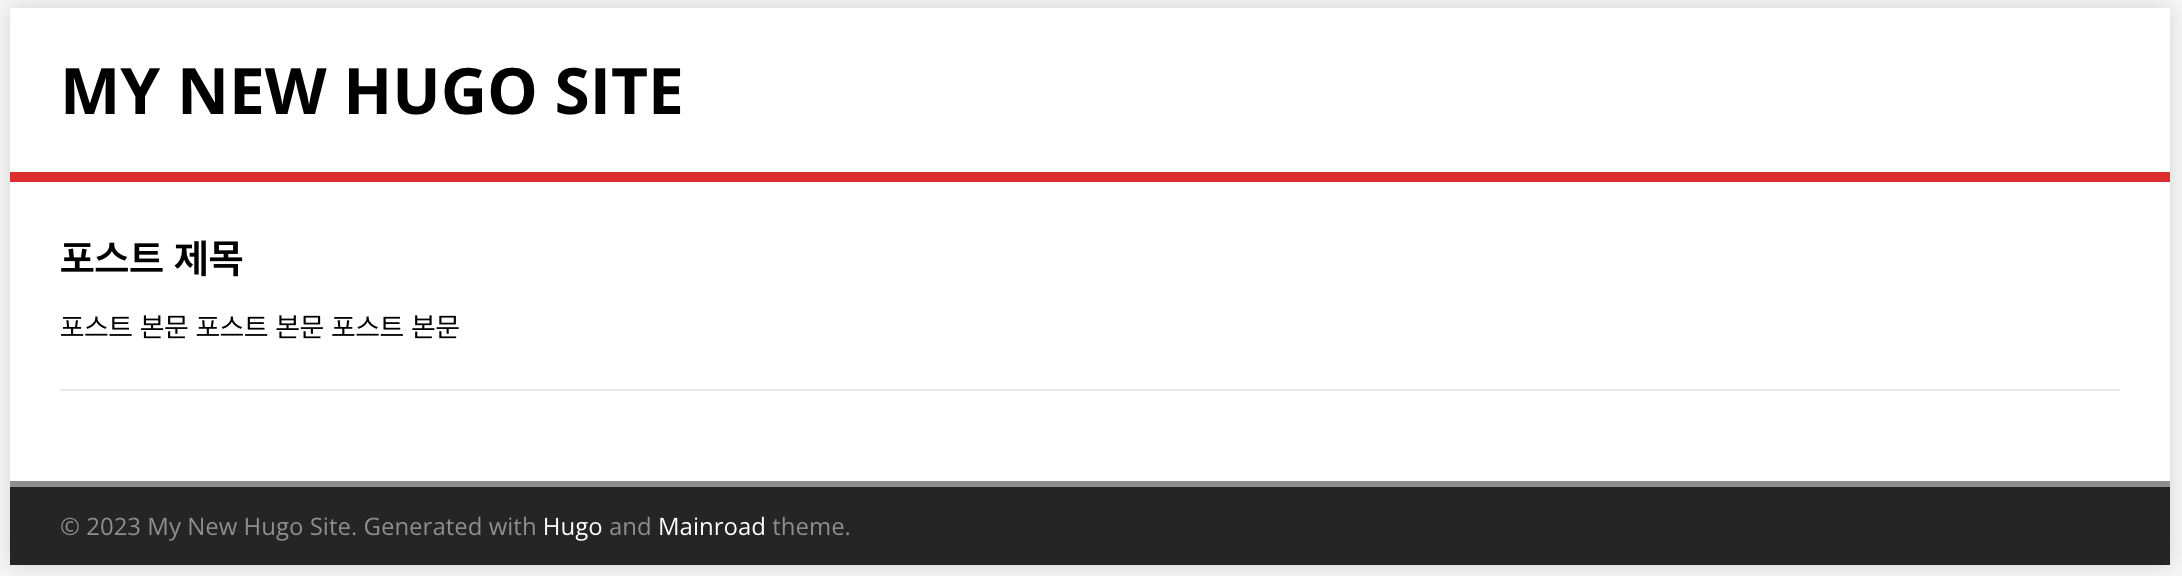
title = "My New Hugo Site"
theme = "mainroad"
Writing a Post
Here, let’s write one example post. If you run the hugo new command as follows, a post file (Markdown file) is automatically created under the content directory. Run the command from the top-level directory of the project.
$ hugo new post/sample.md
This creates the content/post/sample.md file. Edit it in the following format.
content/post/sample.md
---
title: "Post Title"
date: 2023-05-05T23:19:43+09:00
#draft: true
---

Post body
Post body
Post body
If the draft: true line in the header is not removed or commented out, the page will not be output, so that line must be removed.
Starting the Hugo Web Server
After configuring the website theme and writing an article, run the hugo server command to start the web server.
% hugo server
Start building sites …
hugo v0.104.3+extended darwin/arm64 BuildDate=unknown

                   | EN
-------------------+-----
  Pages            |  7
  Paginator pages  |  0
  Non-page files   |  0
  Static files     |  5
  Processed images |  0
  Aliases          |  3
  Sitemaps         |  1
  Cleaned          |  0

Built in 7 ms
Watching for changes in /Users/user/hugo-tutorial/my-site/{archetypes,content,data,layouts,static,themes}
Watching for config changes in /Users/user/hugo-tutorial/my-site/config.toml
Environment: "development"
Serving pages from memory
Running in Fast Render Mode. For full rebuilds on change: hugo server --disableFastRender
Web Server is available at http://localhost:1313/ (bind address 127.0.0.1)
Press Ctrl+C to stop
It takes only 7 ms to start the Hugo server. It is extremely fast.
With the Hugo server running, open http://localhost:1313/ in a web browser and the first page of the site will be displayed.
From then on, continue writing posts with the hugo new command. The Hugo server monitors changes in the content directory and automatically refreshes when posts are created or modified, so once the Hugo server has been started, it does not need to be restarted.
The way to customize posts differs slightly by theme, so refer to each theme’s site for details.